Setting up an FTP server can be highly advantageous specially for traders managing multiple accounts. It provides a centralized platform for securely transferring and storing trading data, such as transaction records, analysis reports, and portfolio updates. FTP servers enable efficient sharing of large files, ensuring timely dissemination of crucial information between traders, brokers, and clients. With robust access controls, traders can manage permissions to safeguard sensitive financial data, adhering to regulatory requirements and maintaining client confidentiality. Automation capabilities streamline repetitive tasks like daily data backups or periodic report generation, saving time and reducing manual errors. Cross-platform compatibility ensures accessibility from various devices and locations, facilitating seamless collaboration and real-time decision-making. Overall, FTP servers offer traders a reliable, secure, and scalable solution for managing and sharing financial information across their diverse portfolio of accounts.
Tip
To setup FTP server, follow the steps below:
Installing the FTP server
1Open Server Manager
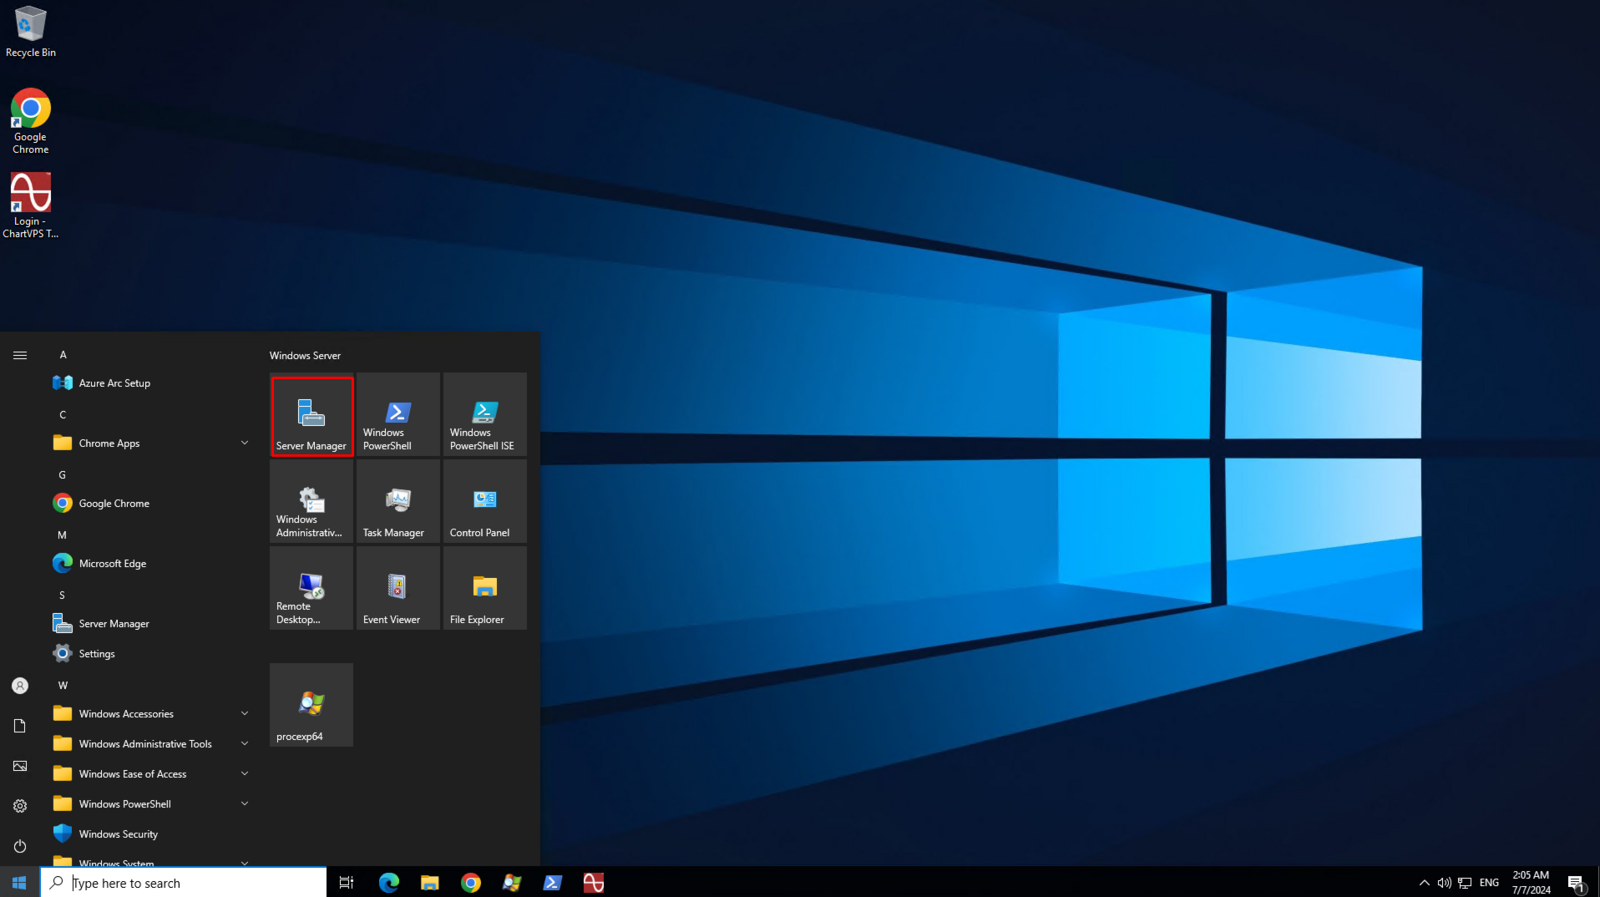
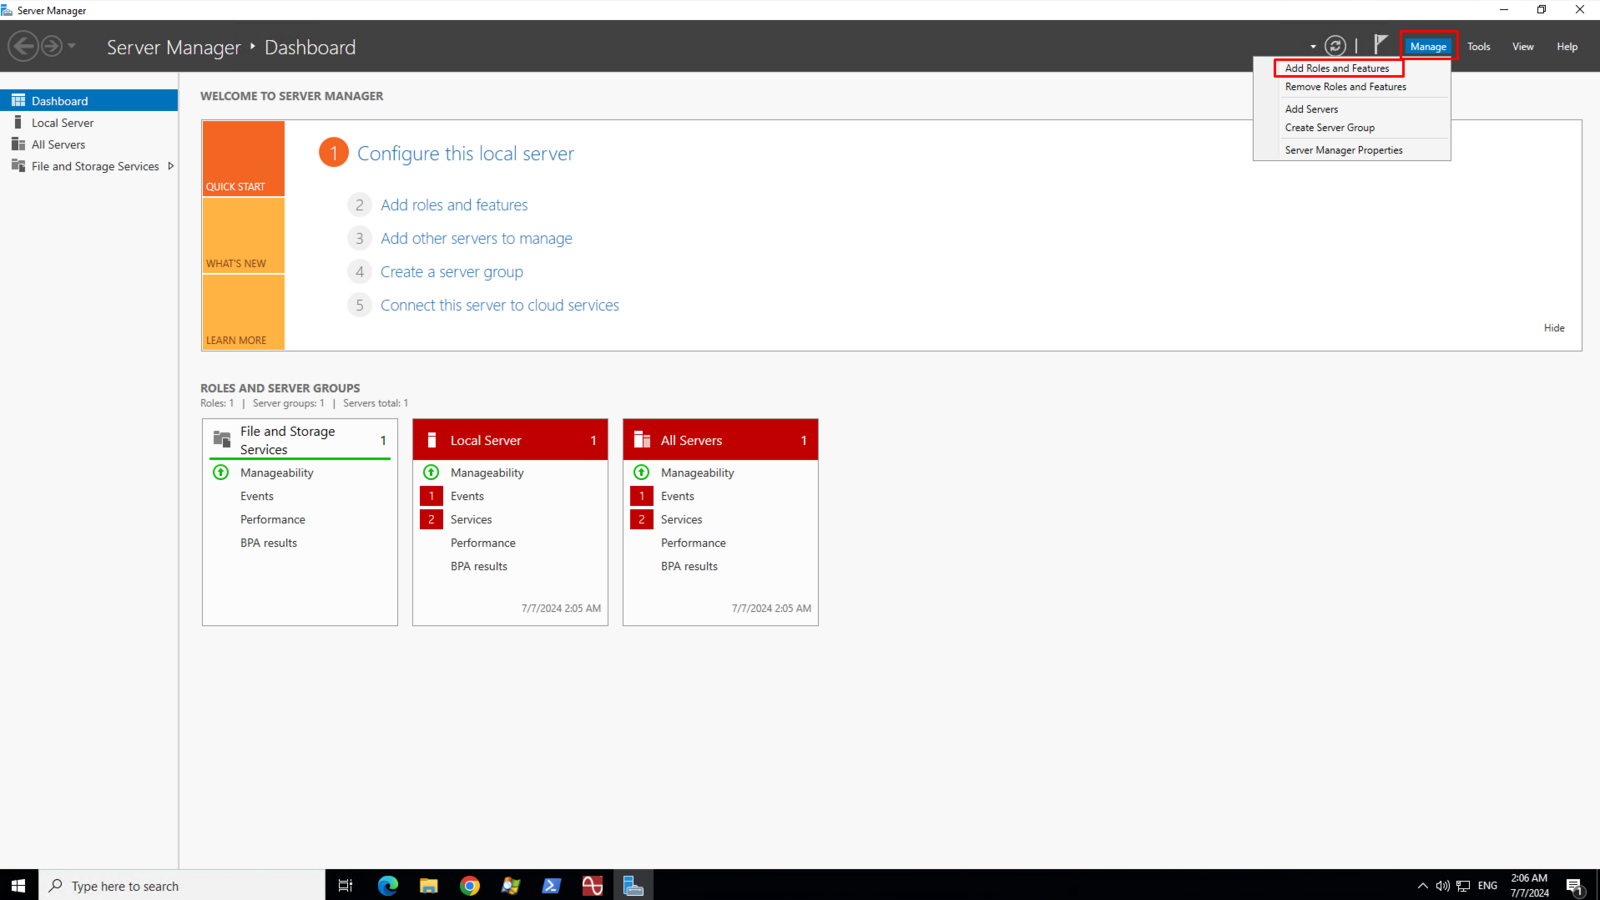
2On the top right menu, click Manage and then click the Add Roles and Features sub menu
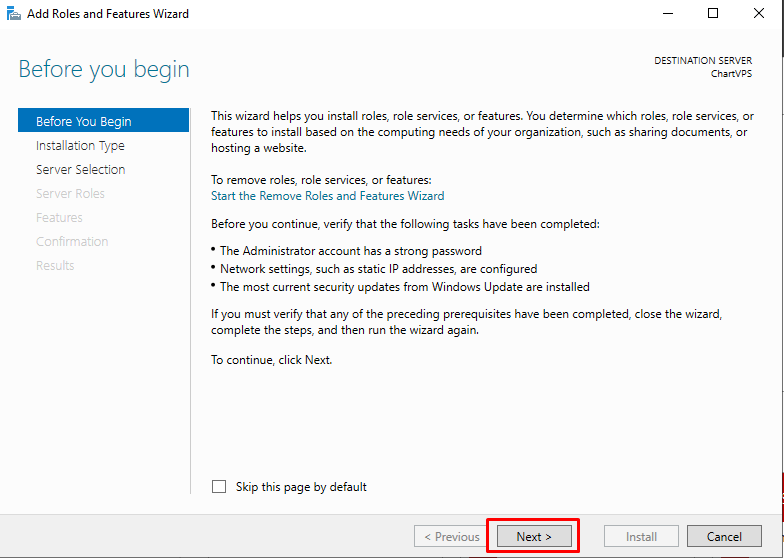
3On Before you begin page, click Next
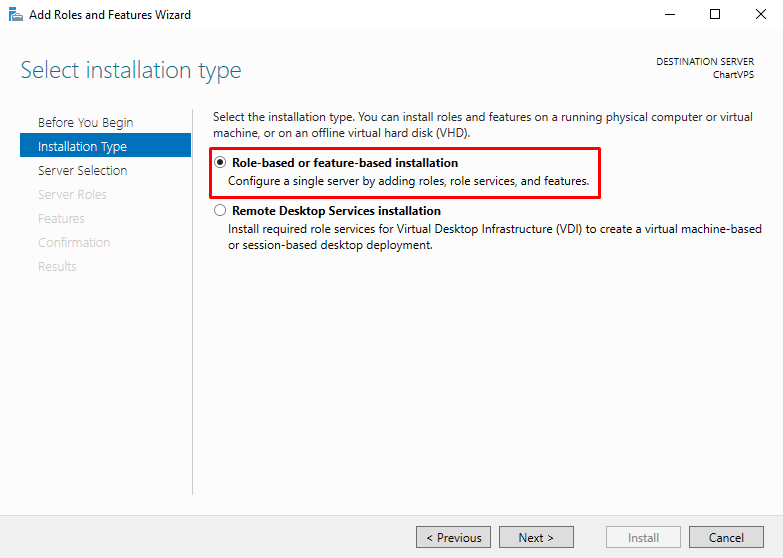
4On Installation Type, make sure that Role-based or feature-based installation is selected
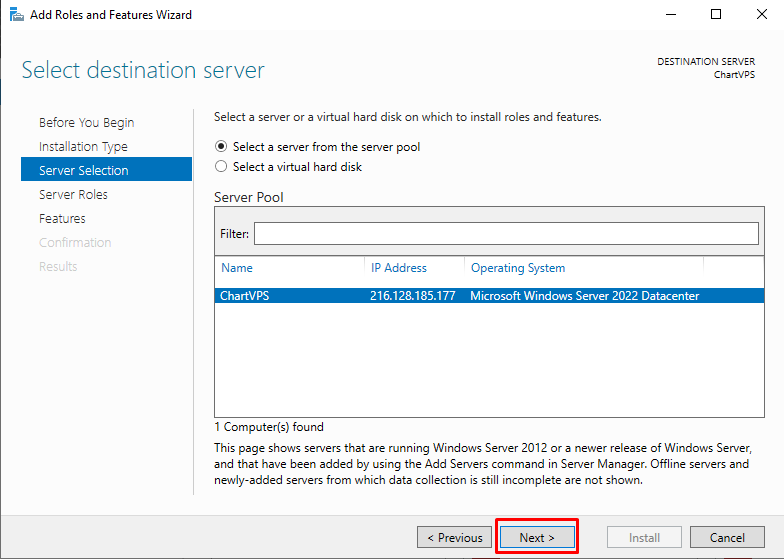
5On Server Selection page, click Next
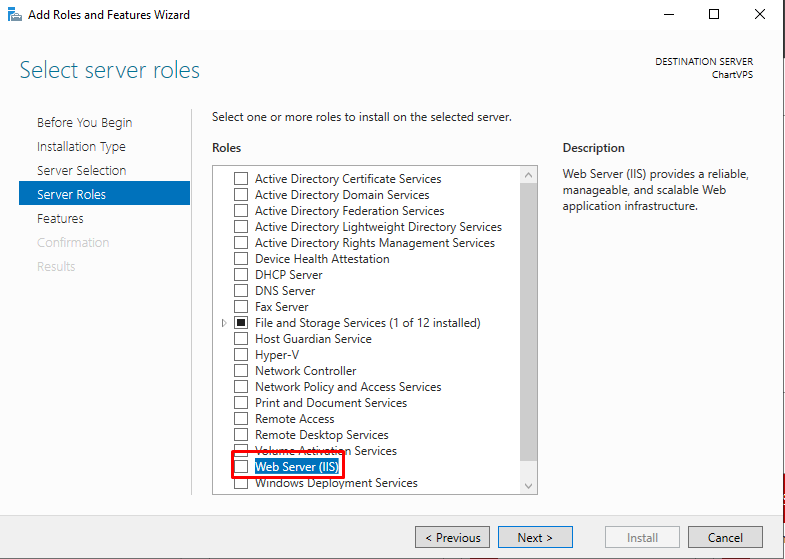
6On Server Roles page, click to check Web Server (IIS)
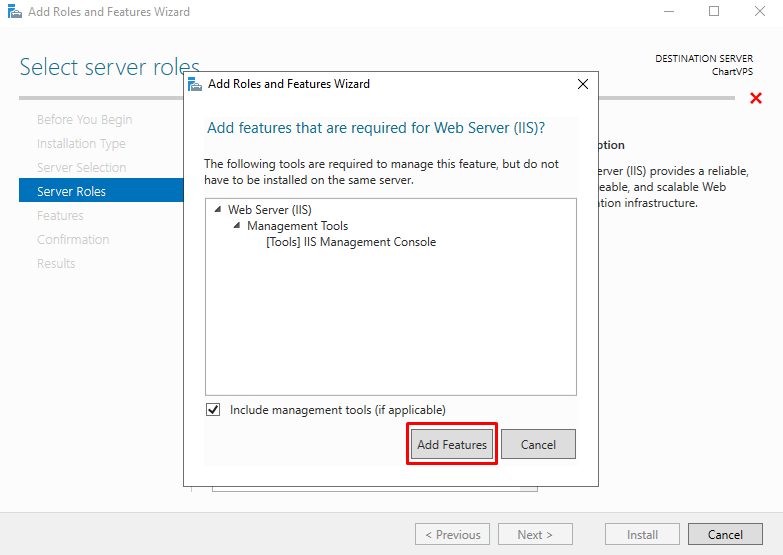
7Click the Add Features button once you get a prompt about the tools required by IIS then click Next
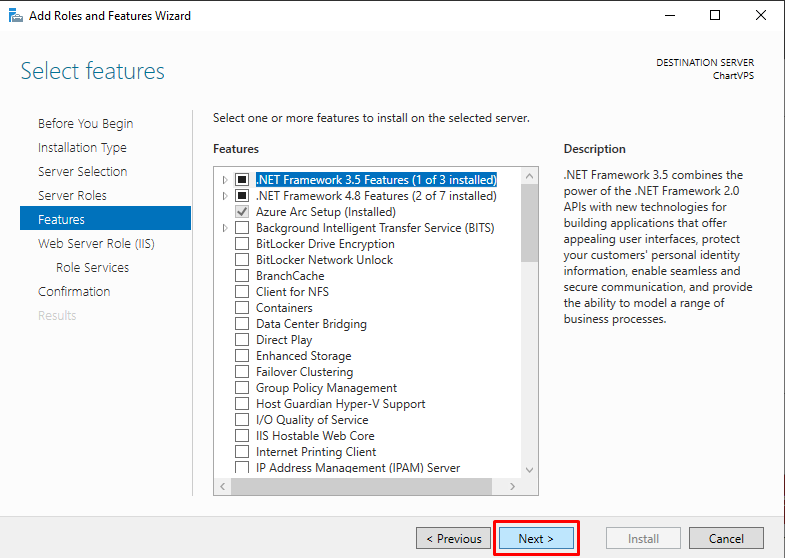
8On the Features page, click Next
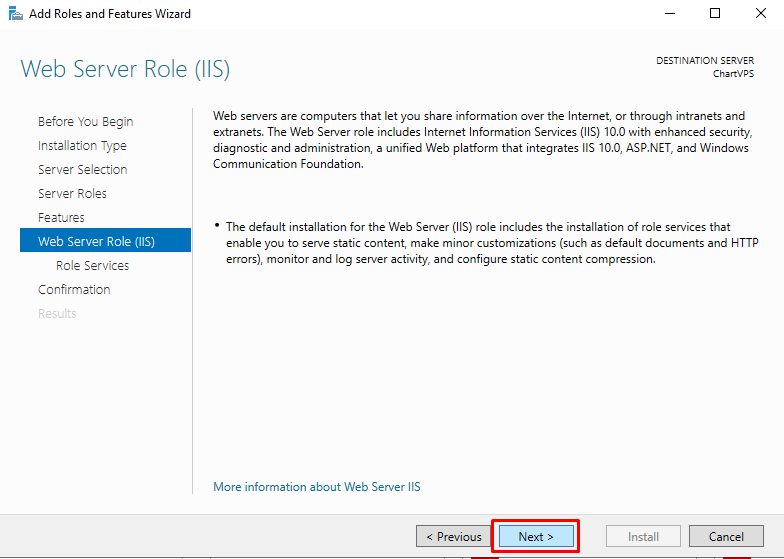
9On the Web Server Role (IIS), click Next
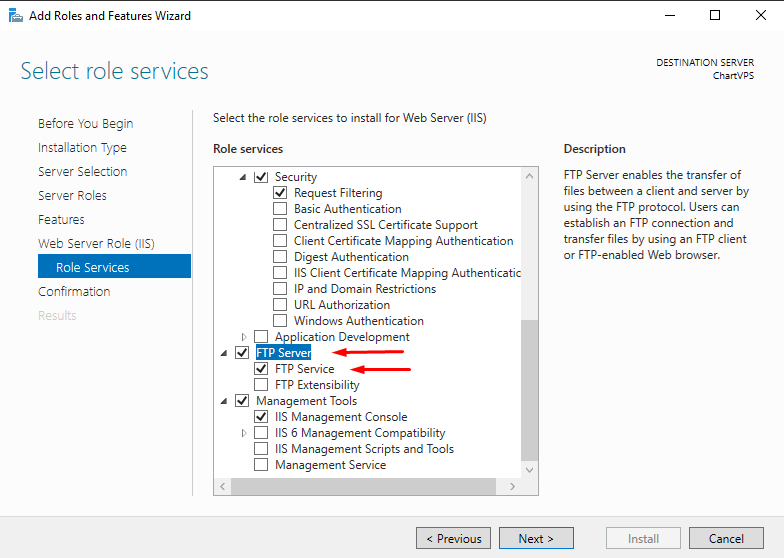
10On the Role Services, scroll down and click to check the FTP Server box and make sure that the FTP Service box below FTP Server is also checked then click Next
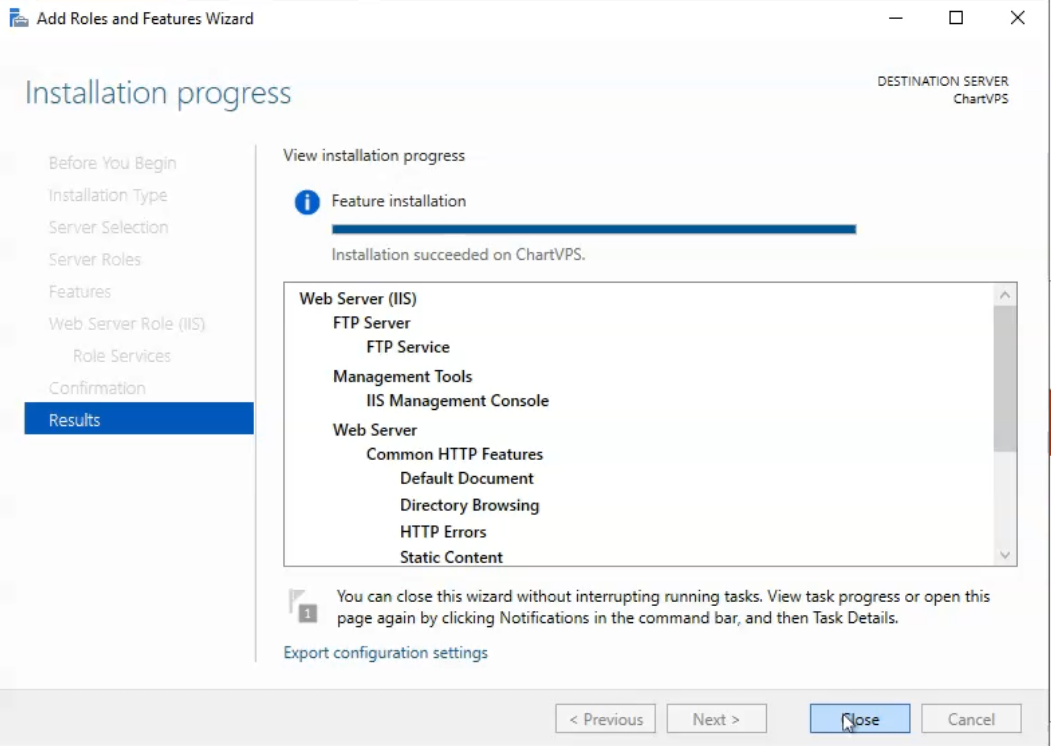
11Click the Install button on the Confirmation page.
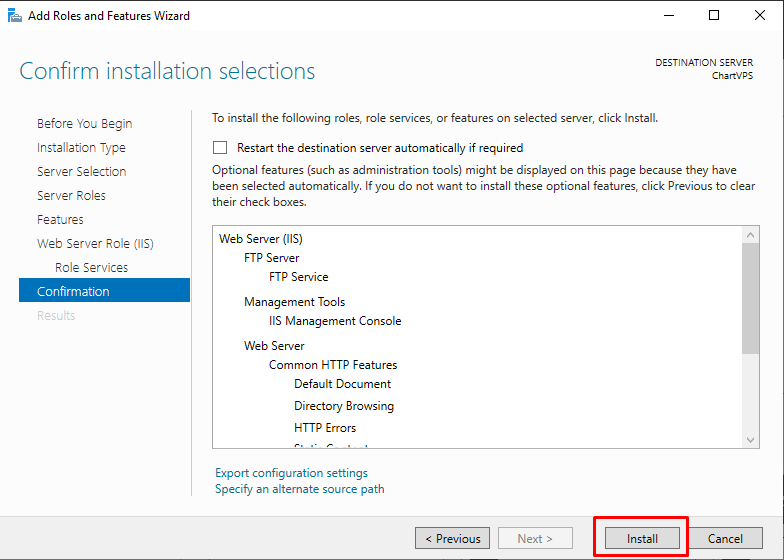
Installation may take up to 5 minutes and you will get a message Installation Succeeded when IIS installation is complete.
Tip
Configuring FTP site
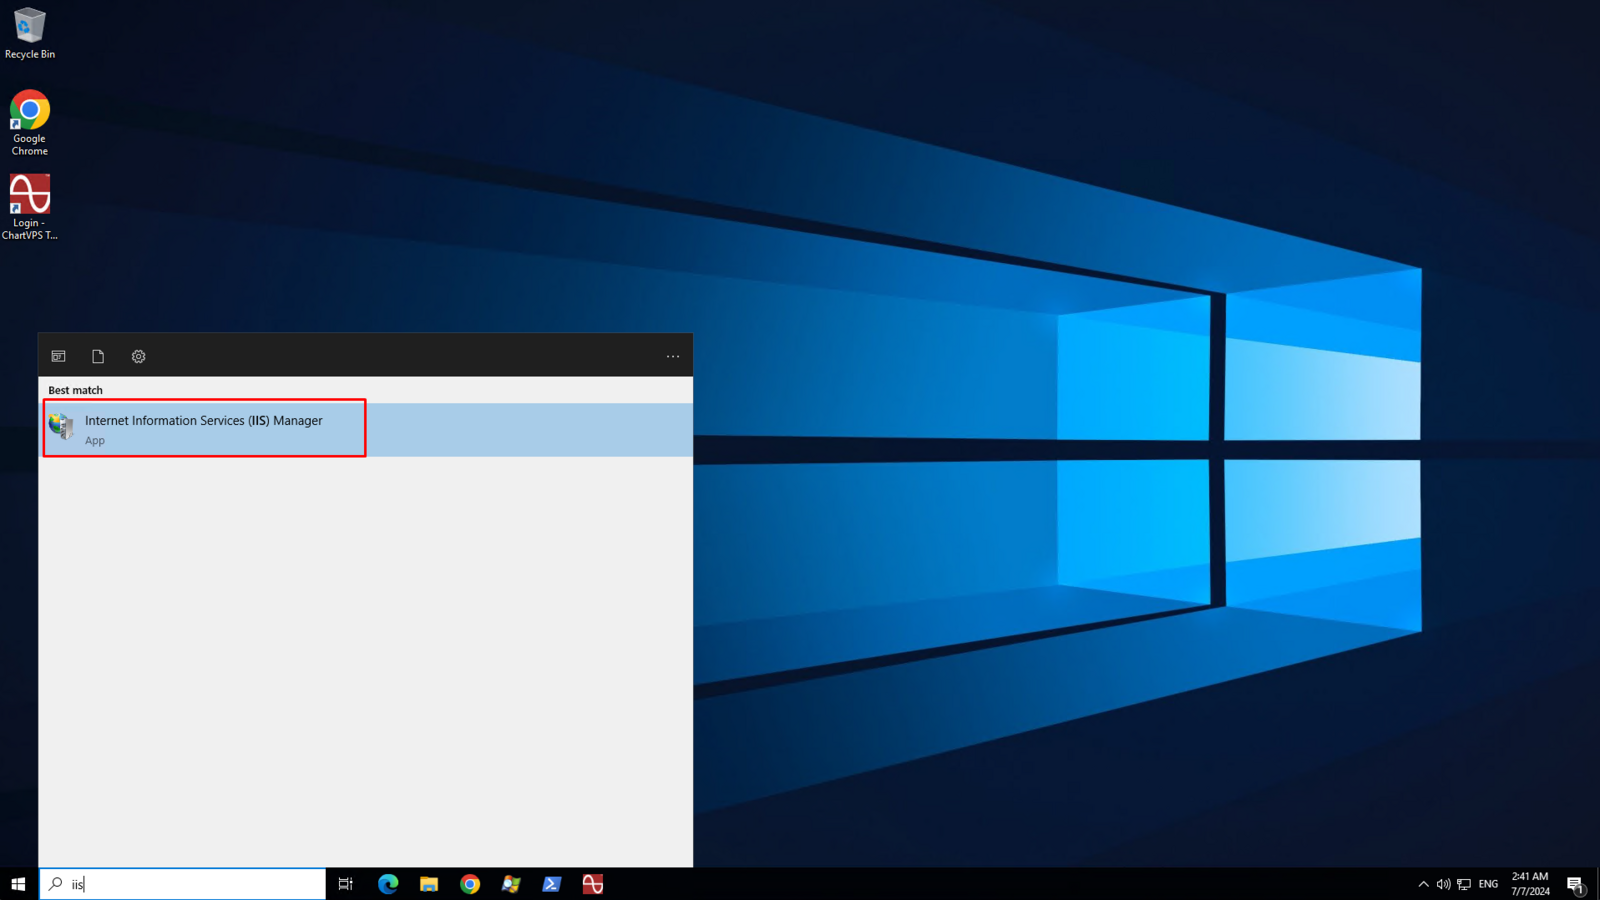
1Type IIS in the Windows Search Bar then click on Internet Information Services (IIS) Manager
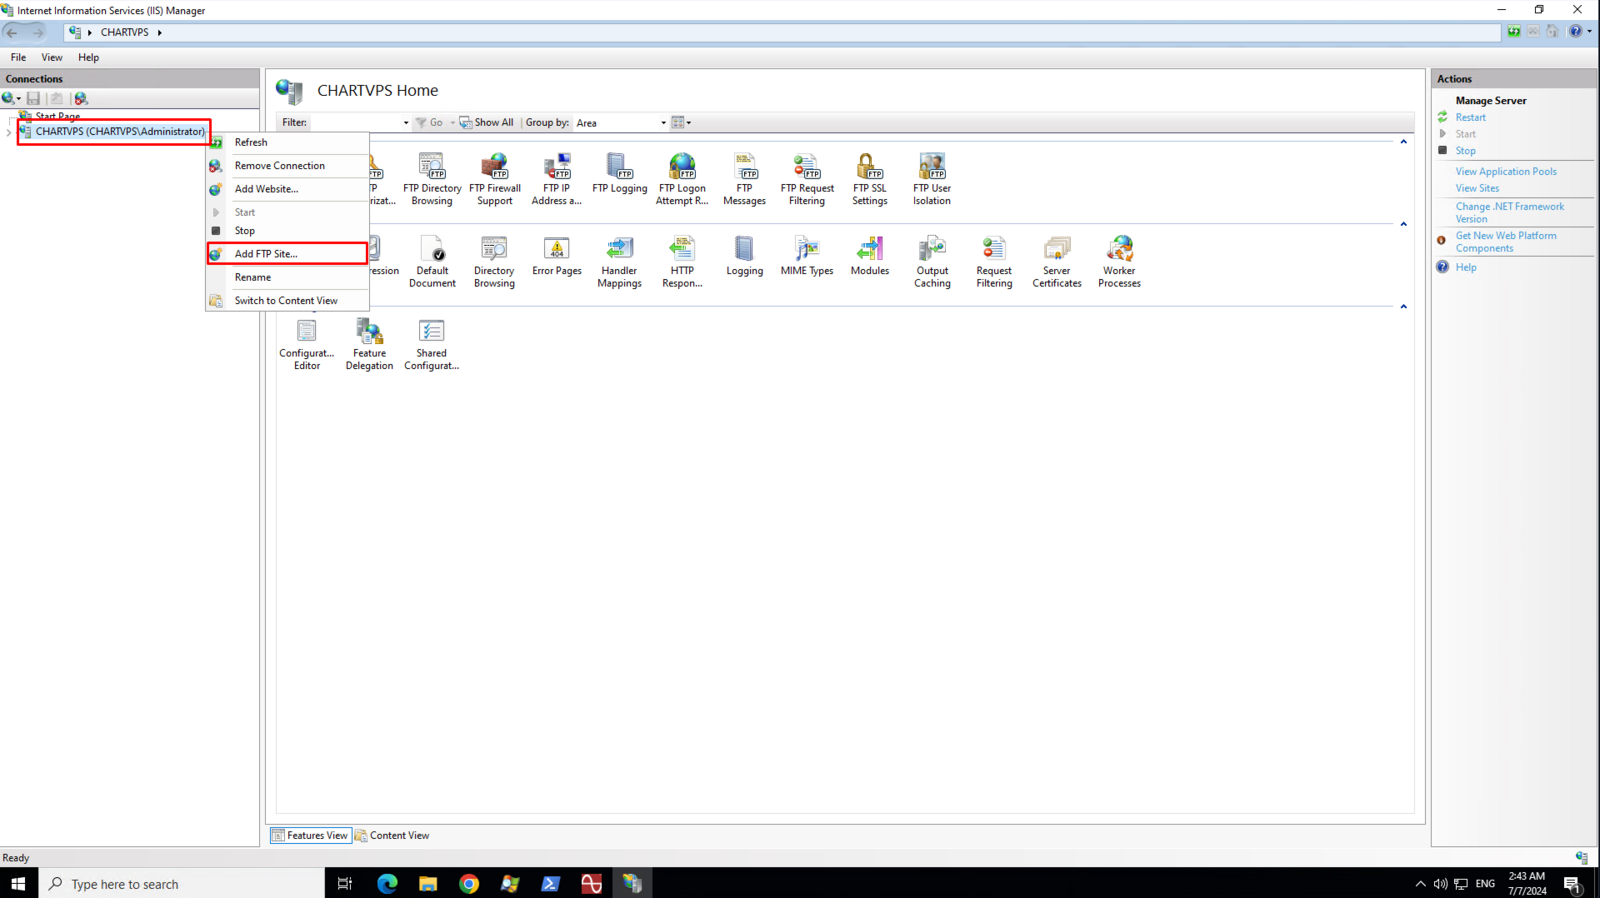
2On the left pane of IIS Manager, Right Click on CHARTVPS (may vary depending on your machine name) and then click Add FTP Site context menu
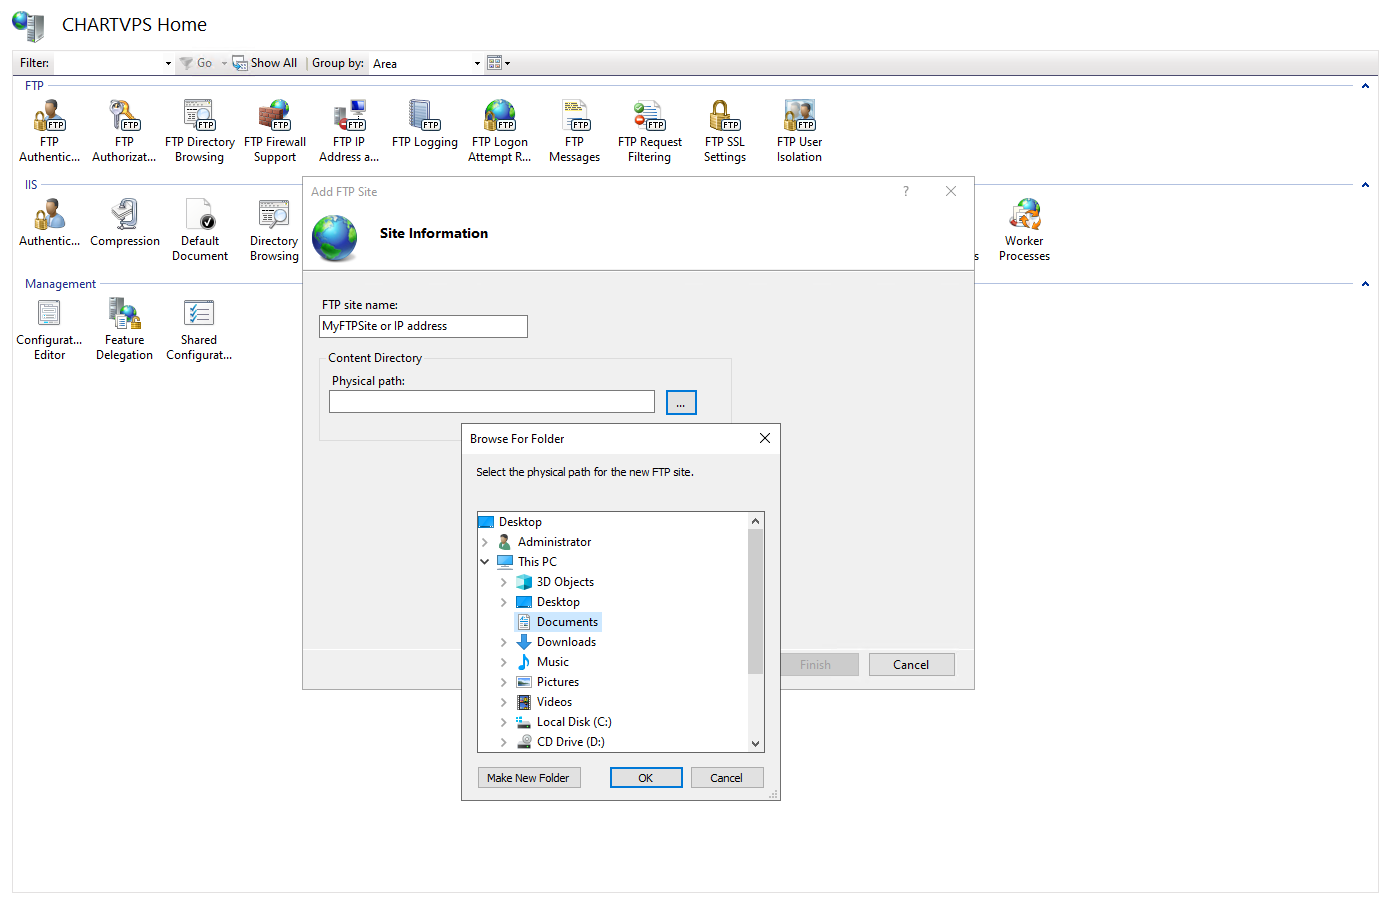
3On the Site Information page, enter the name of your FTP site. It can be any name or your server’s ip address.

4In the Physical path text field, click the three dots on the right hand side of the text box to locate the folder where you want your FTP root directory will store all your files that you wish to share through FTP. All files and sub directories inside the root folder will be accessible through FTP.
5On the Binding and SSL Settings, you may customize your FTP port by changing the number in the Port text box. Make sure to take note of the number as you will have to configure your firewall to allow FTP connections on specific port.
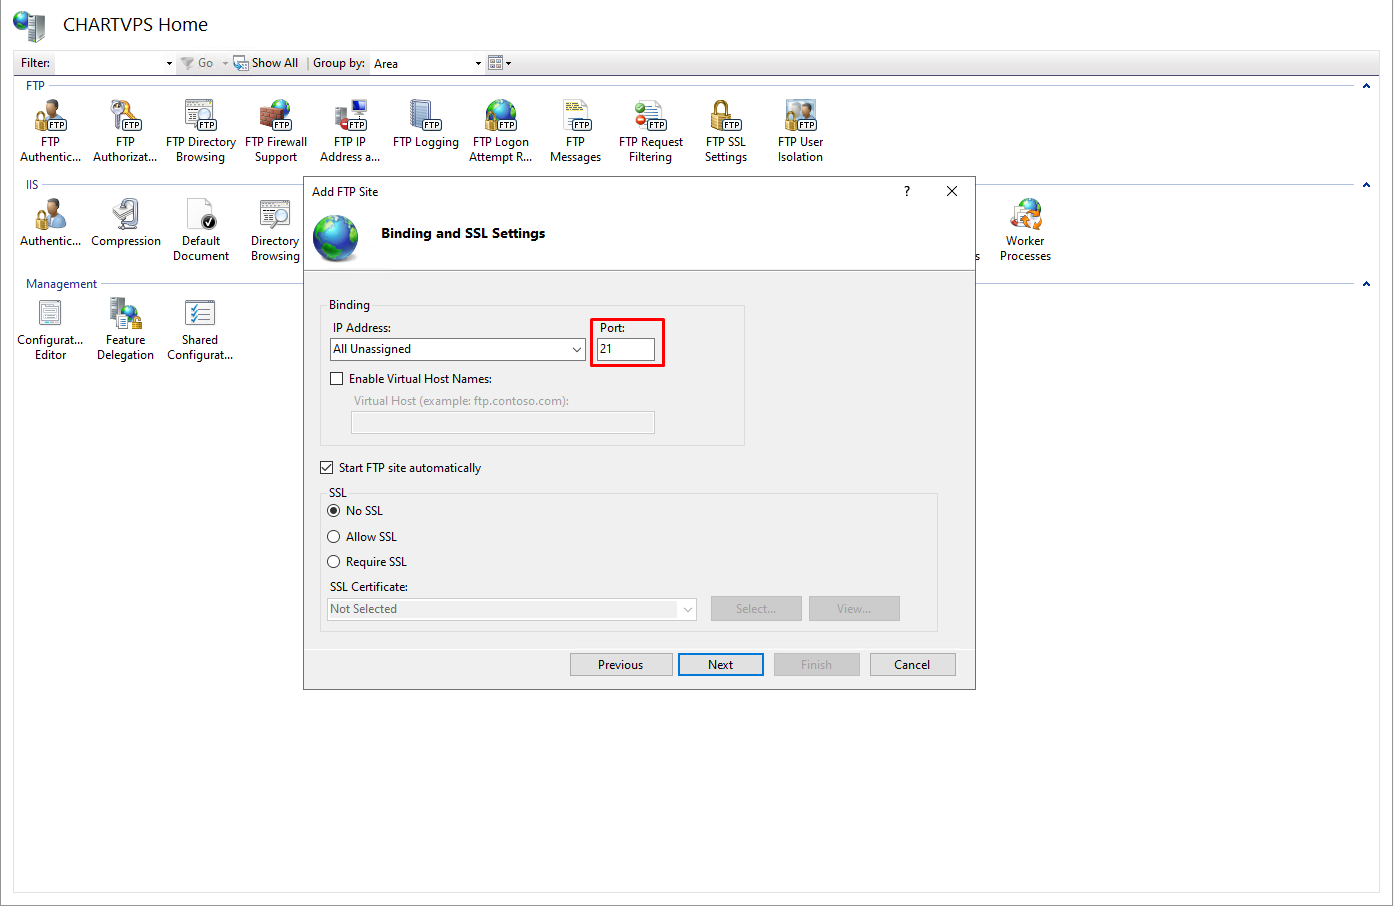
6Select No SSL to proceed with the configuration. If you have your own SSL certificate, you can choose Require SSL option then click on the Select button to locate your SSL certificate.

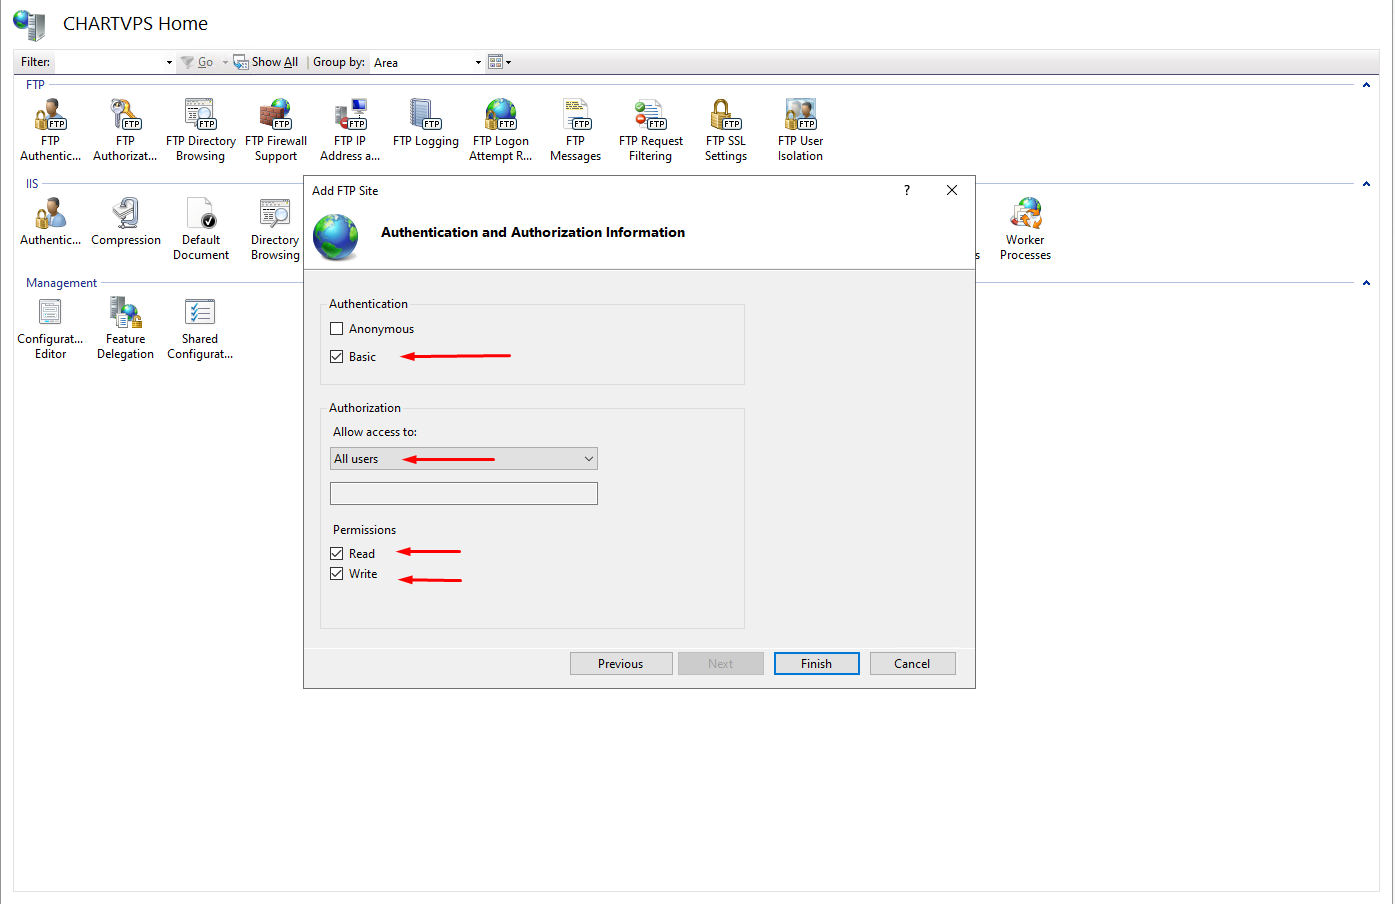
7On the Authentication and Authorization Information page, click to select Basic authentication and select All Users under Allow access to drop down box. Click to check Read and Write boxes to allow users to download, upload, and delete files on your FTP site. Once everything is set, click the Finish button.
Configuring the Firewall
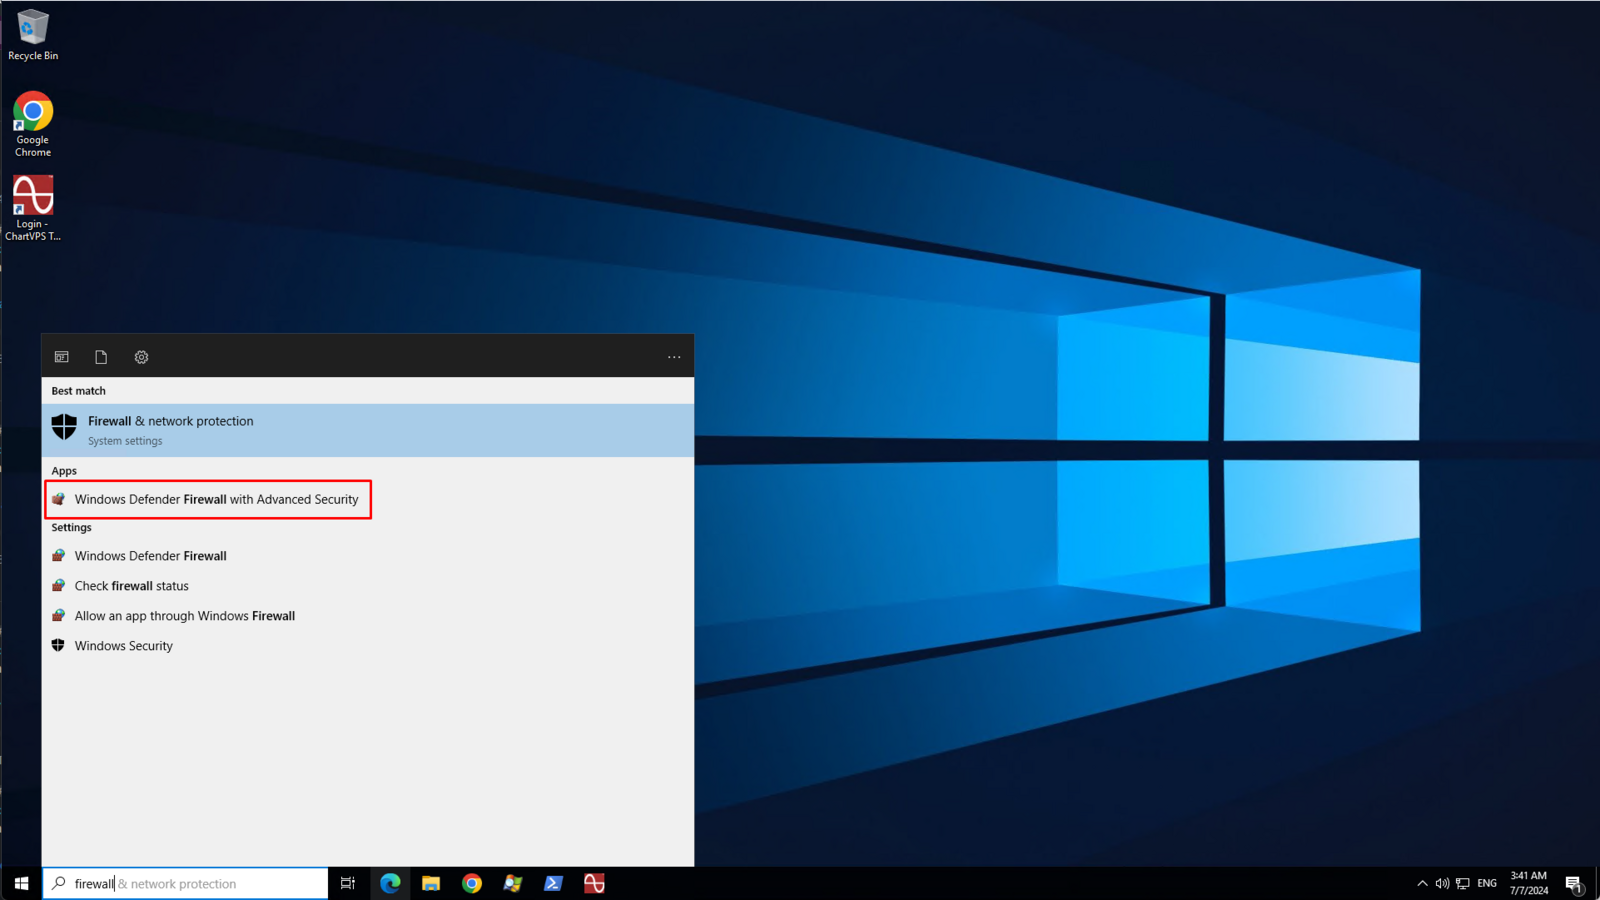
Type firewall in the Windows Search Bar then click Windows Defender Firewall with Advanced Security
Creating an Inbound rule
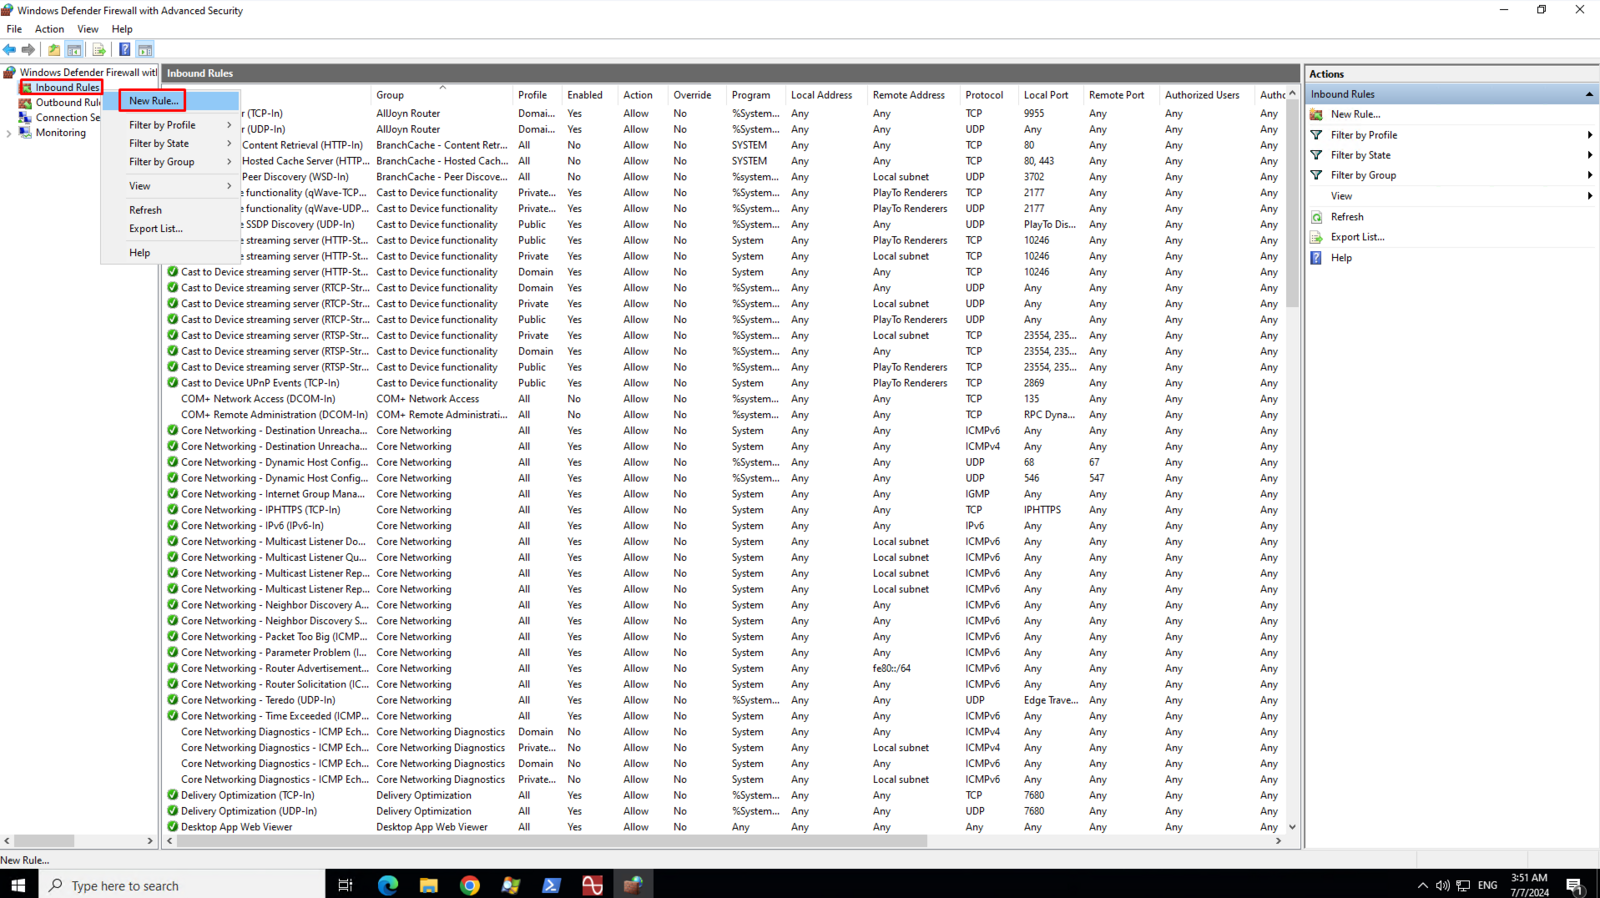
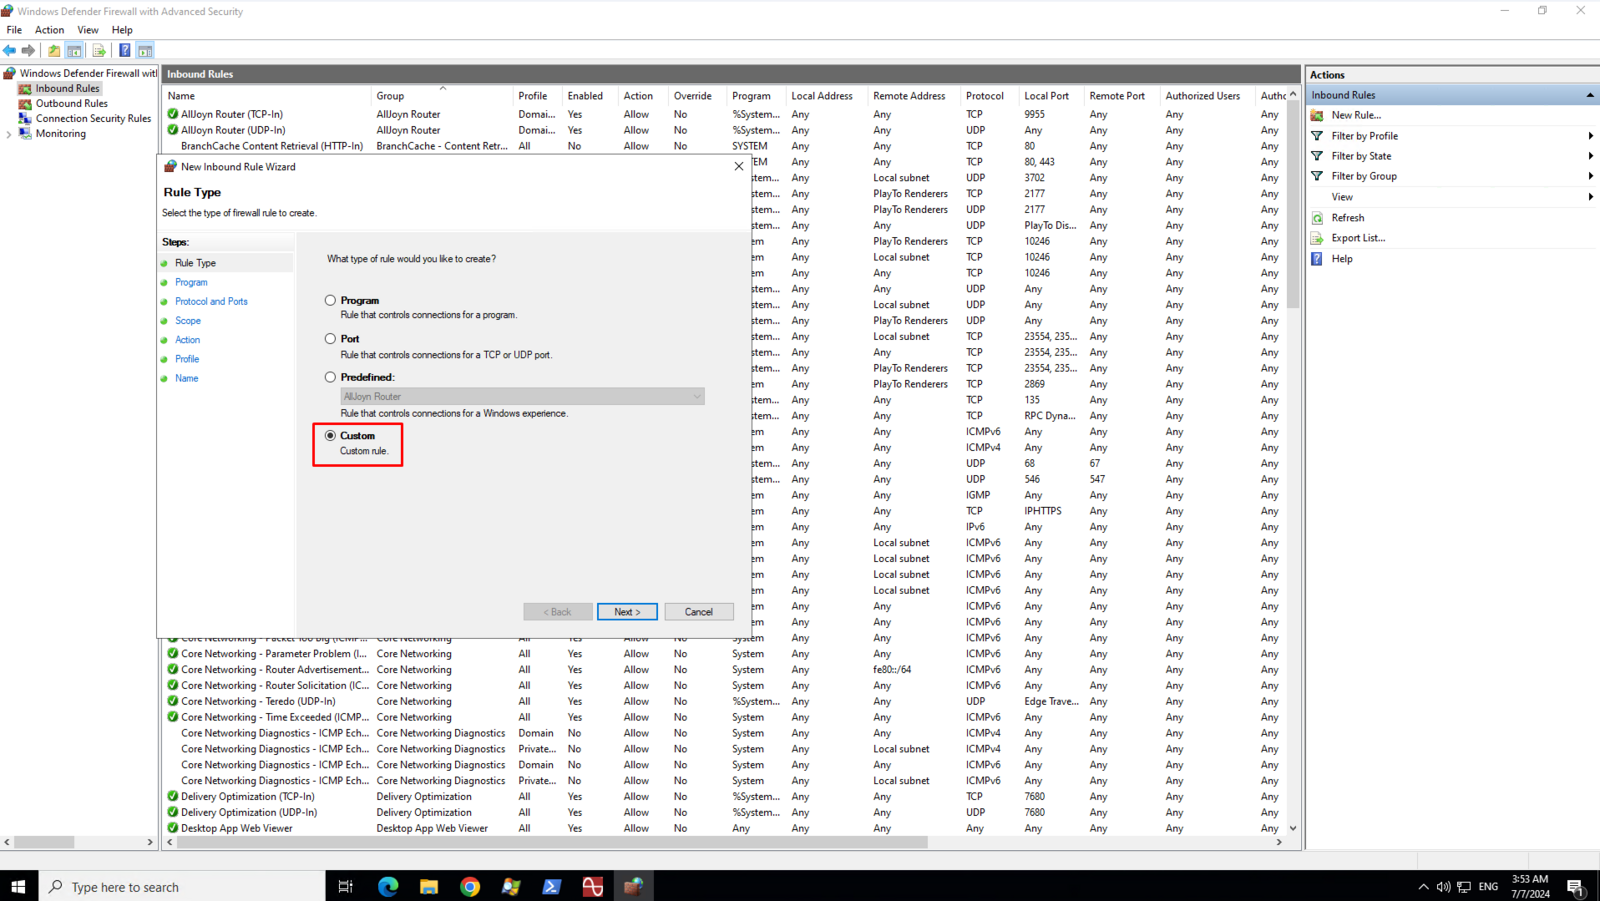
1On the left pane, right-click on the Inbound Rules and then click New Rule
2On the Rule Type page, select Custom then click Next
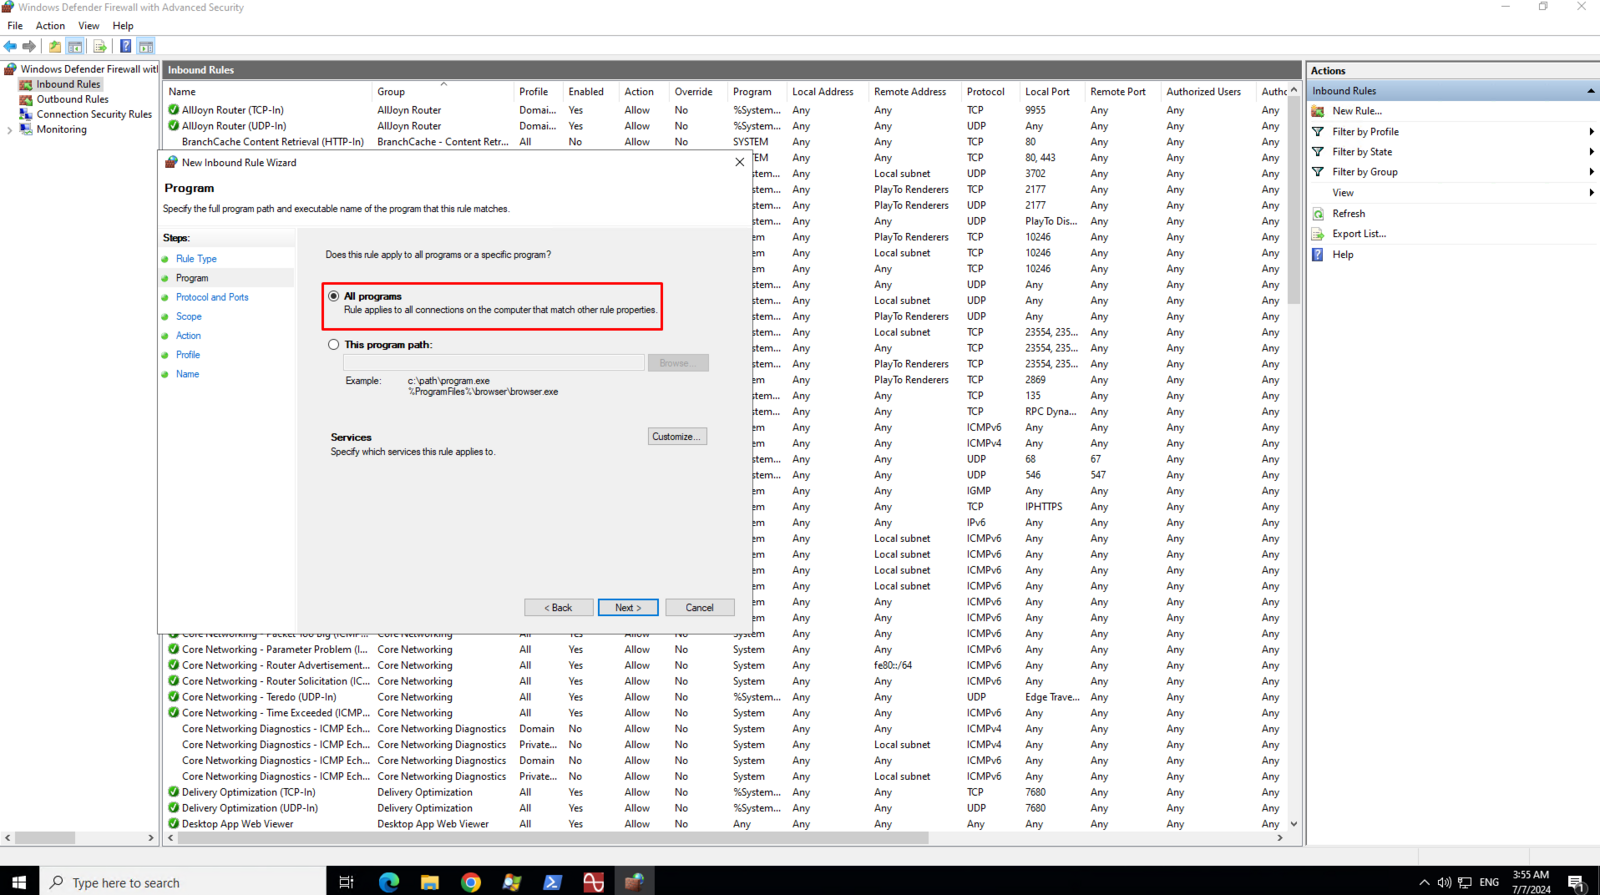
3On the Program page, select All Program then click Next
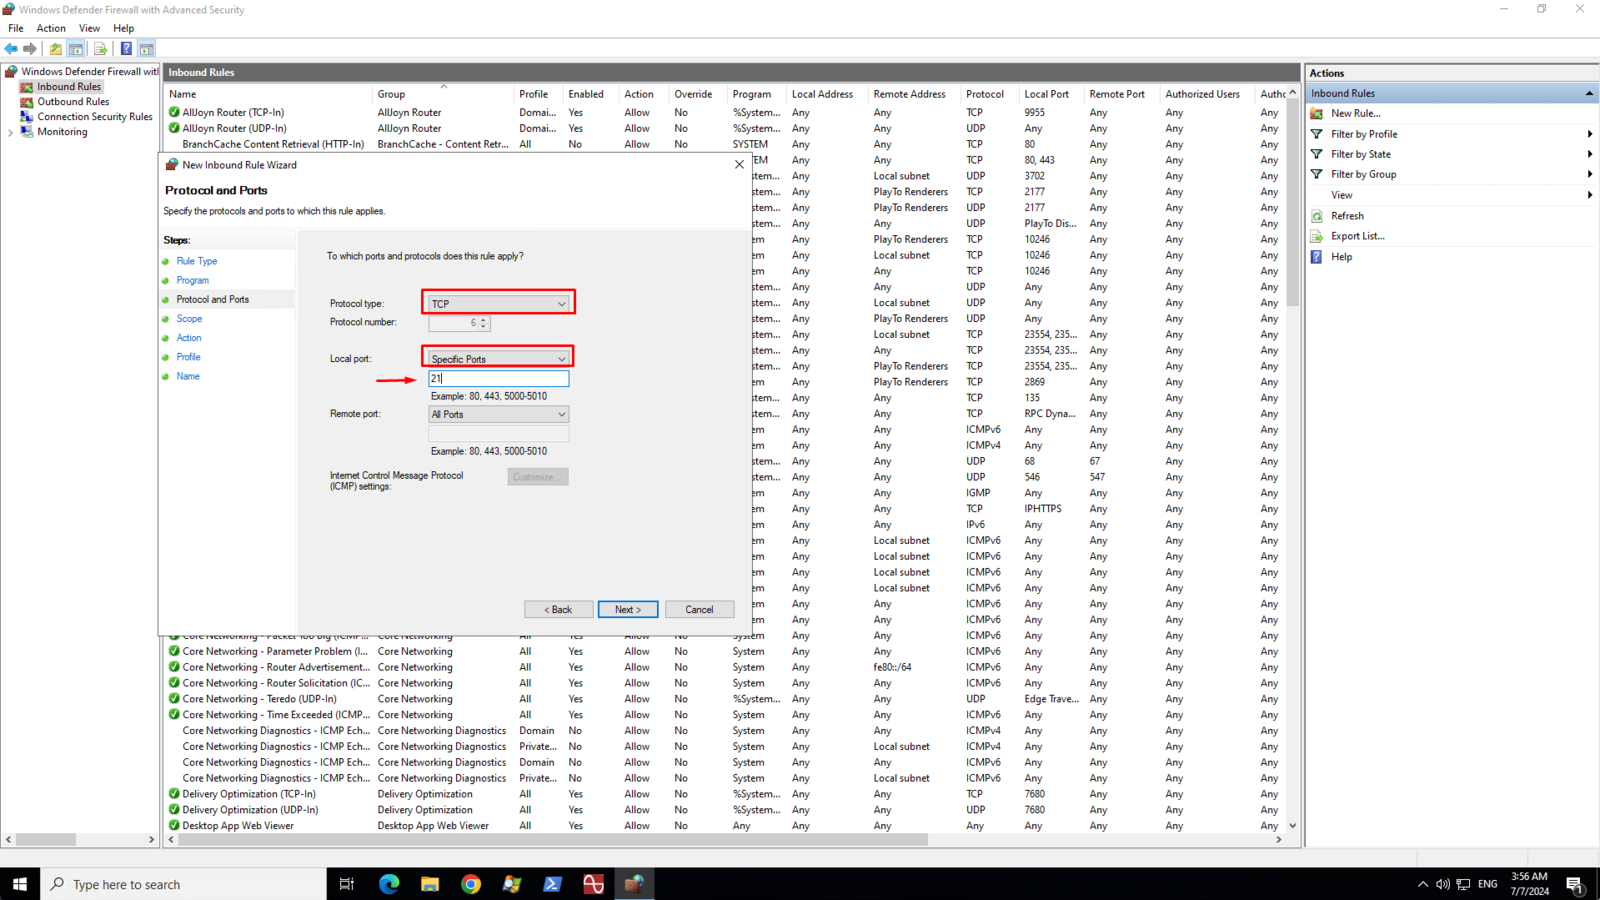
4On the Protocol and Ports page, select TCP from the list of Protocol Type. Select Specific Port from the list of Local port and then enter the port number in the text field below the Local port drop down box. The port must match with the port number you assigned to your FTP bindings.
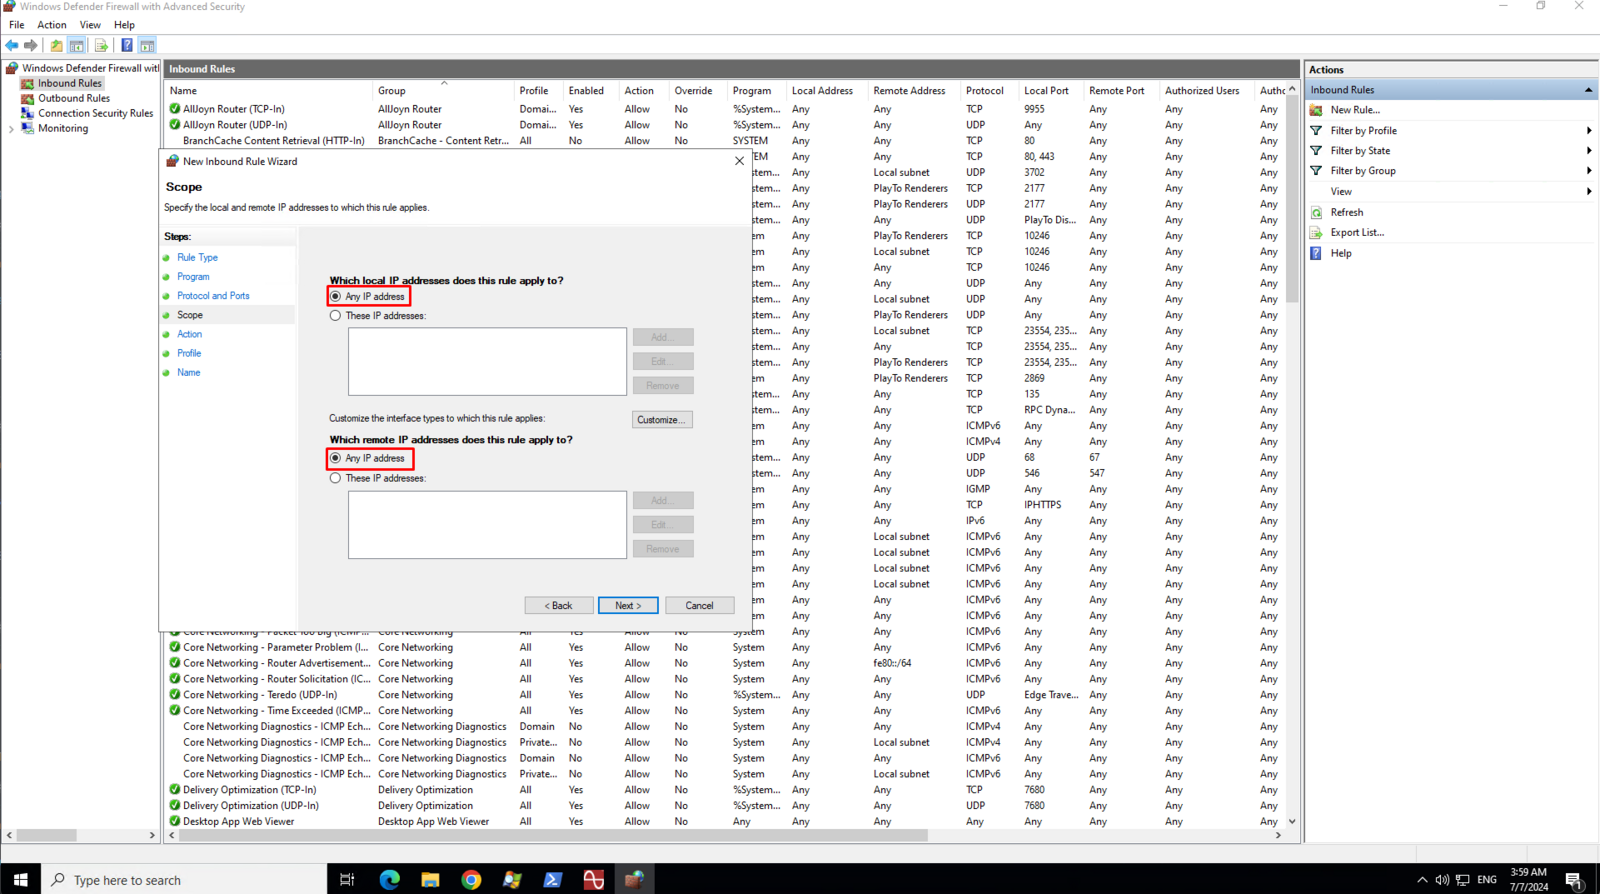
5On the Scope page, select Any IP address for both local and remote ip addresses then click Next
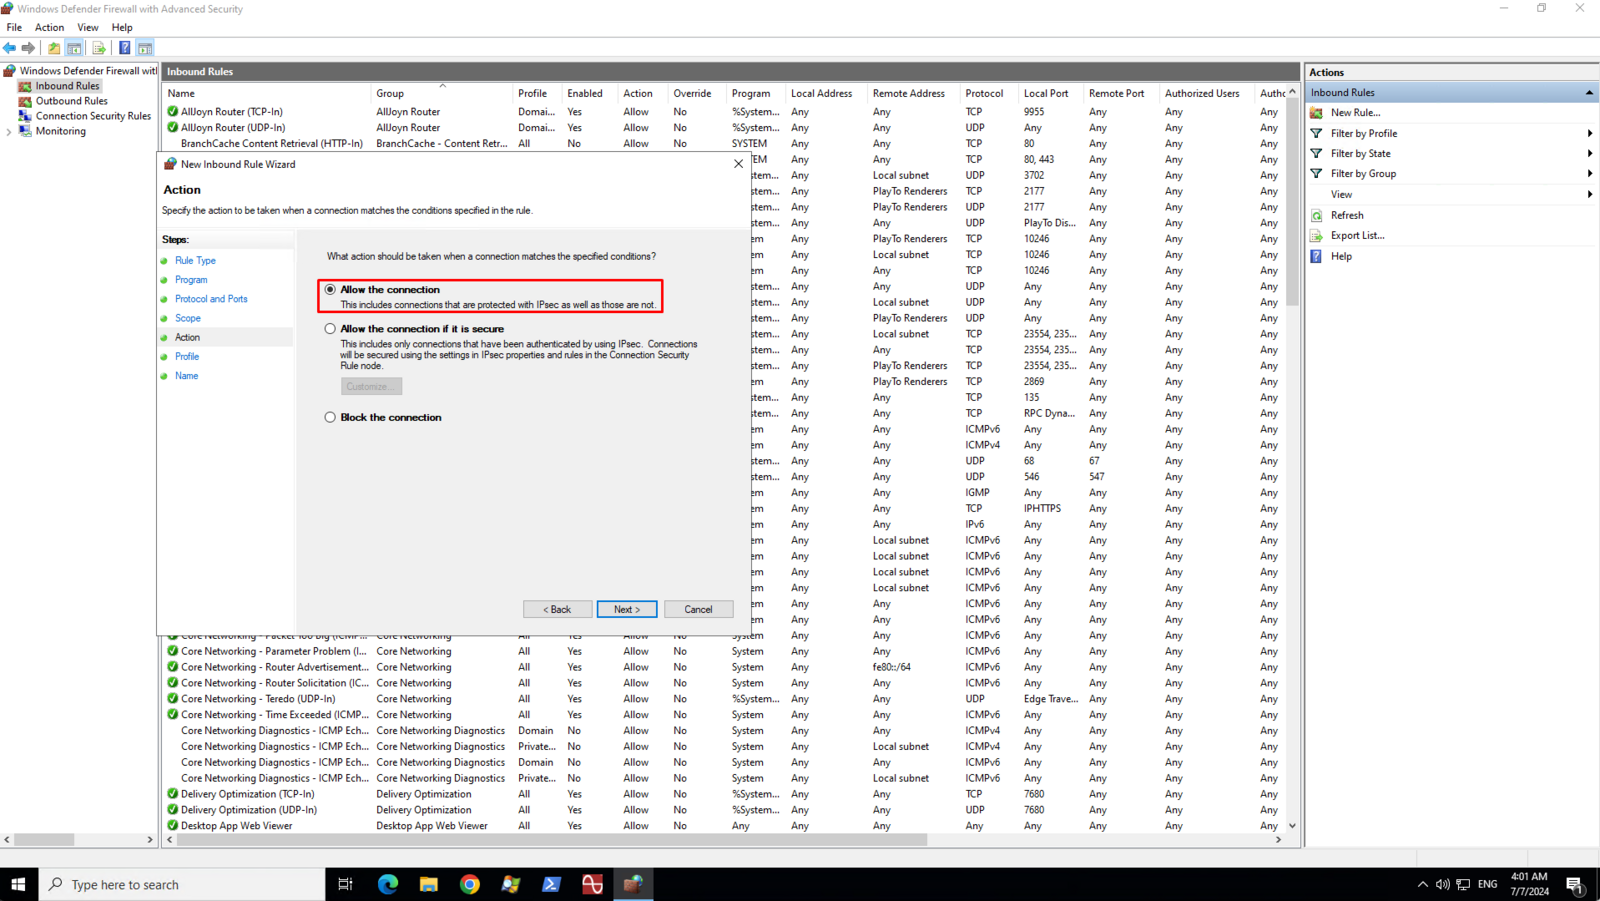
6On the Action page, select Allow the connection then click Next
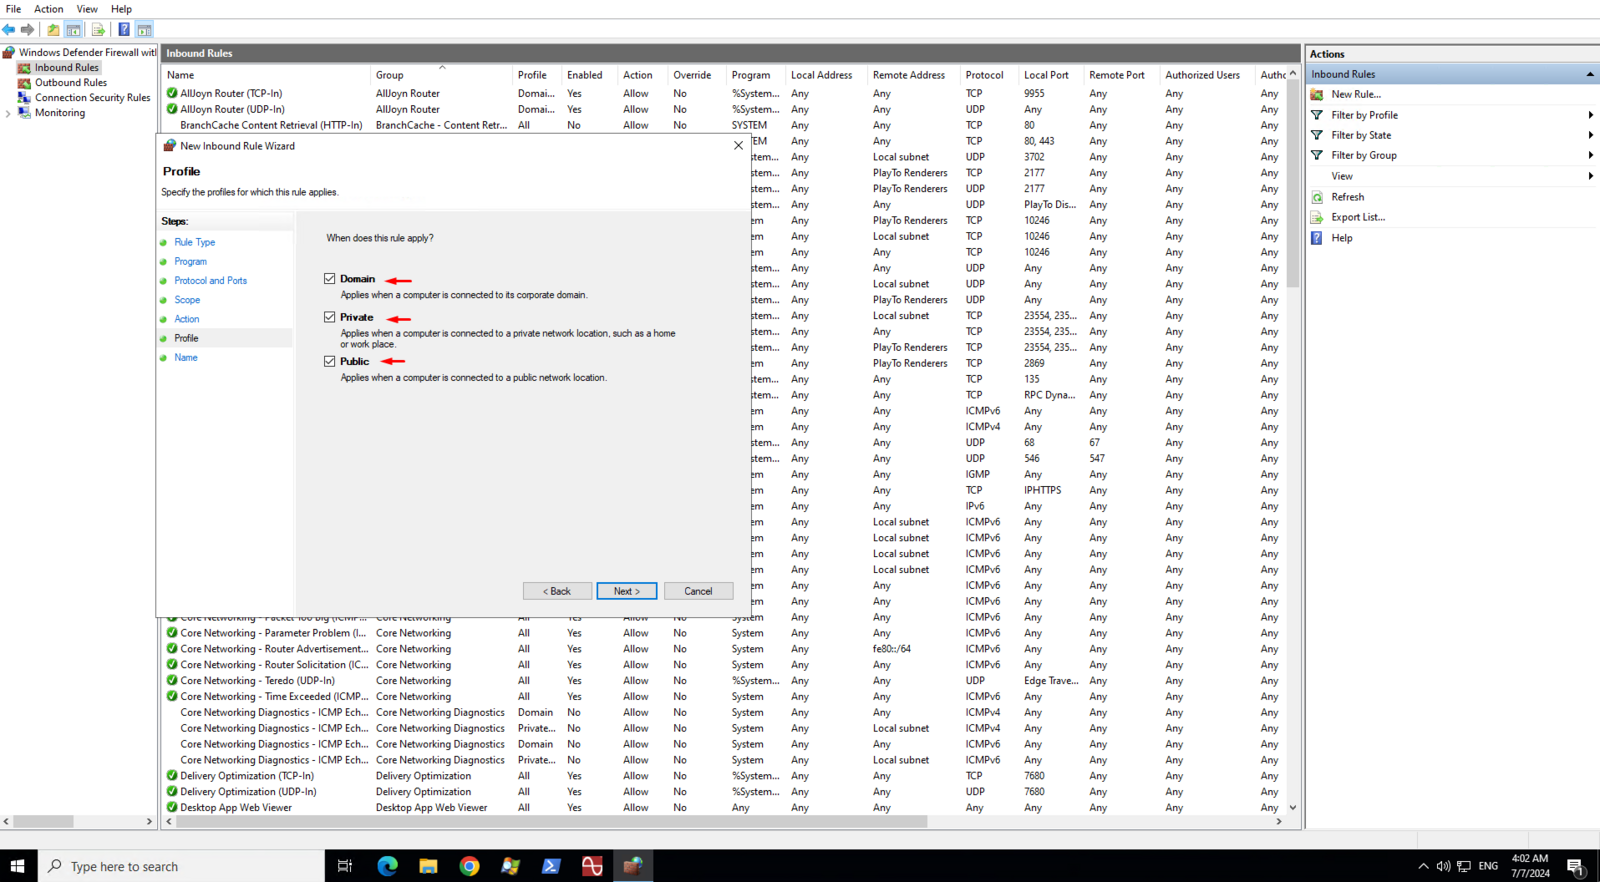
7On the Profile page, make sure that Doman, Private, and Public are checked then click Next
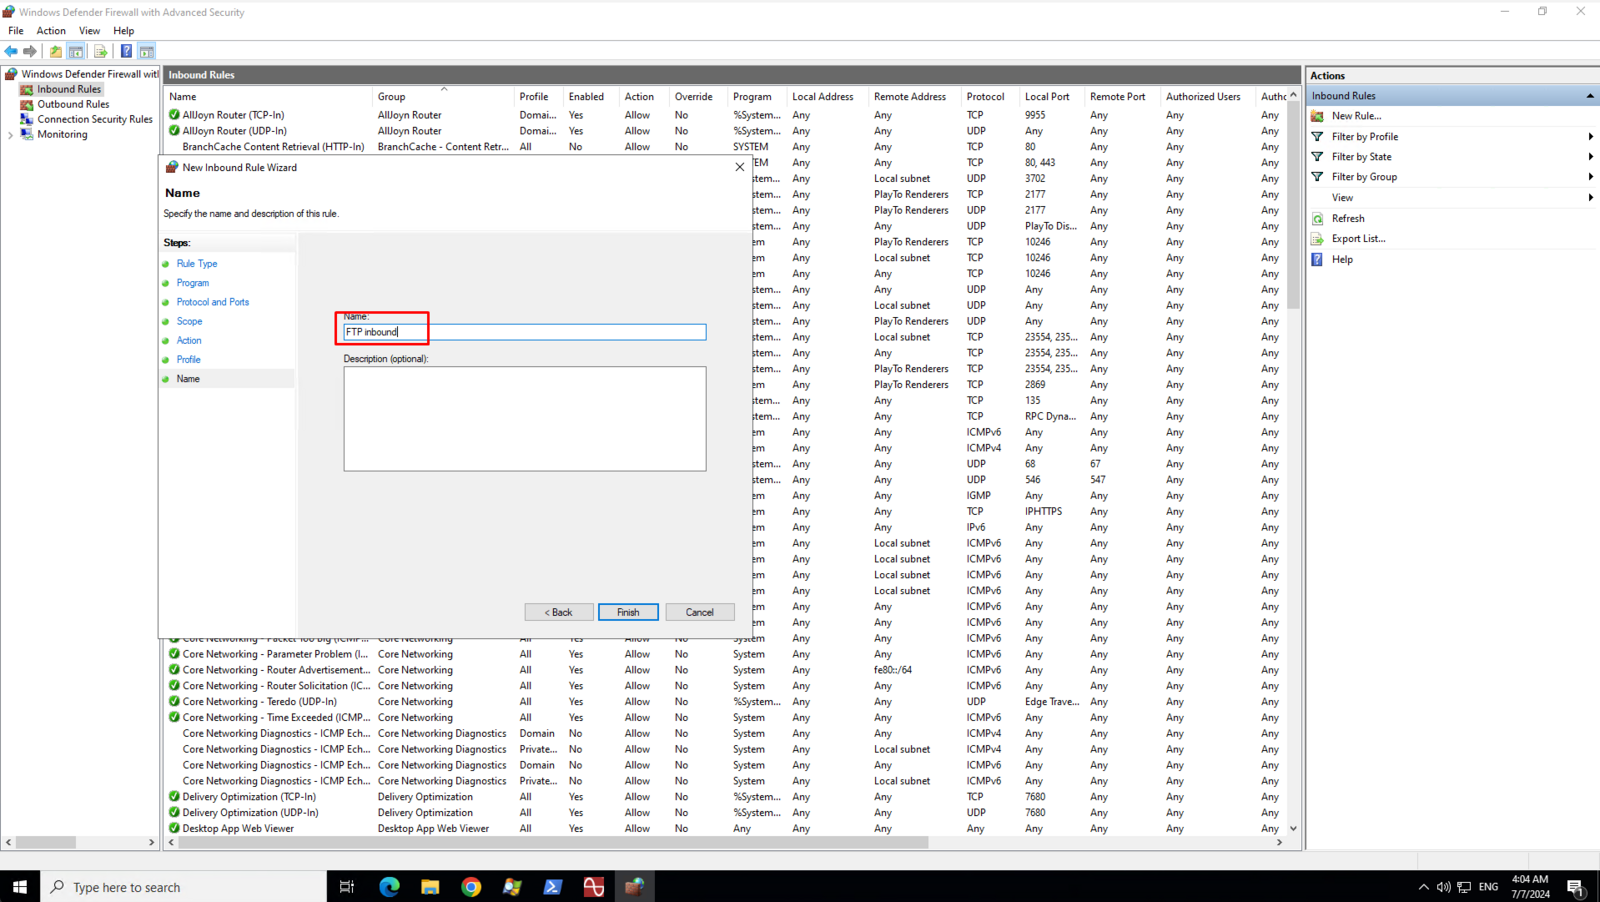
7Enter a name or description for your FTP inbound rule
Creating an Outbound rule
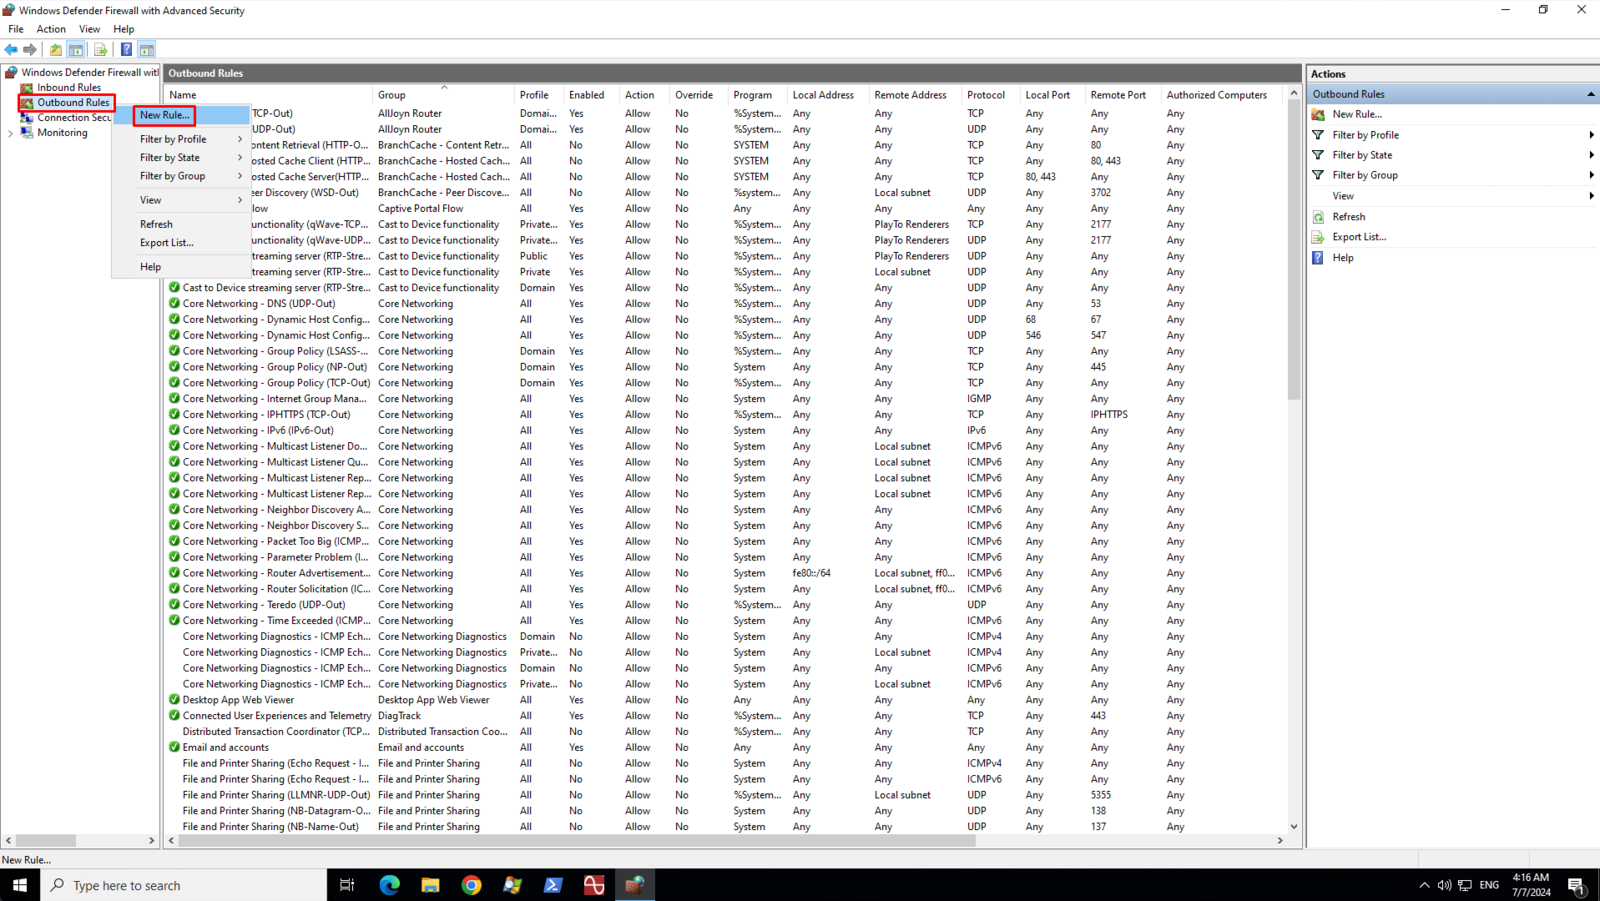
1On the left pane, right-click on the Outbound Rules and then click New Rule
2On the Rule Type page, select Custom then click Next
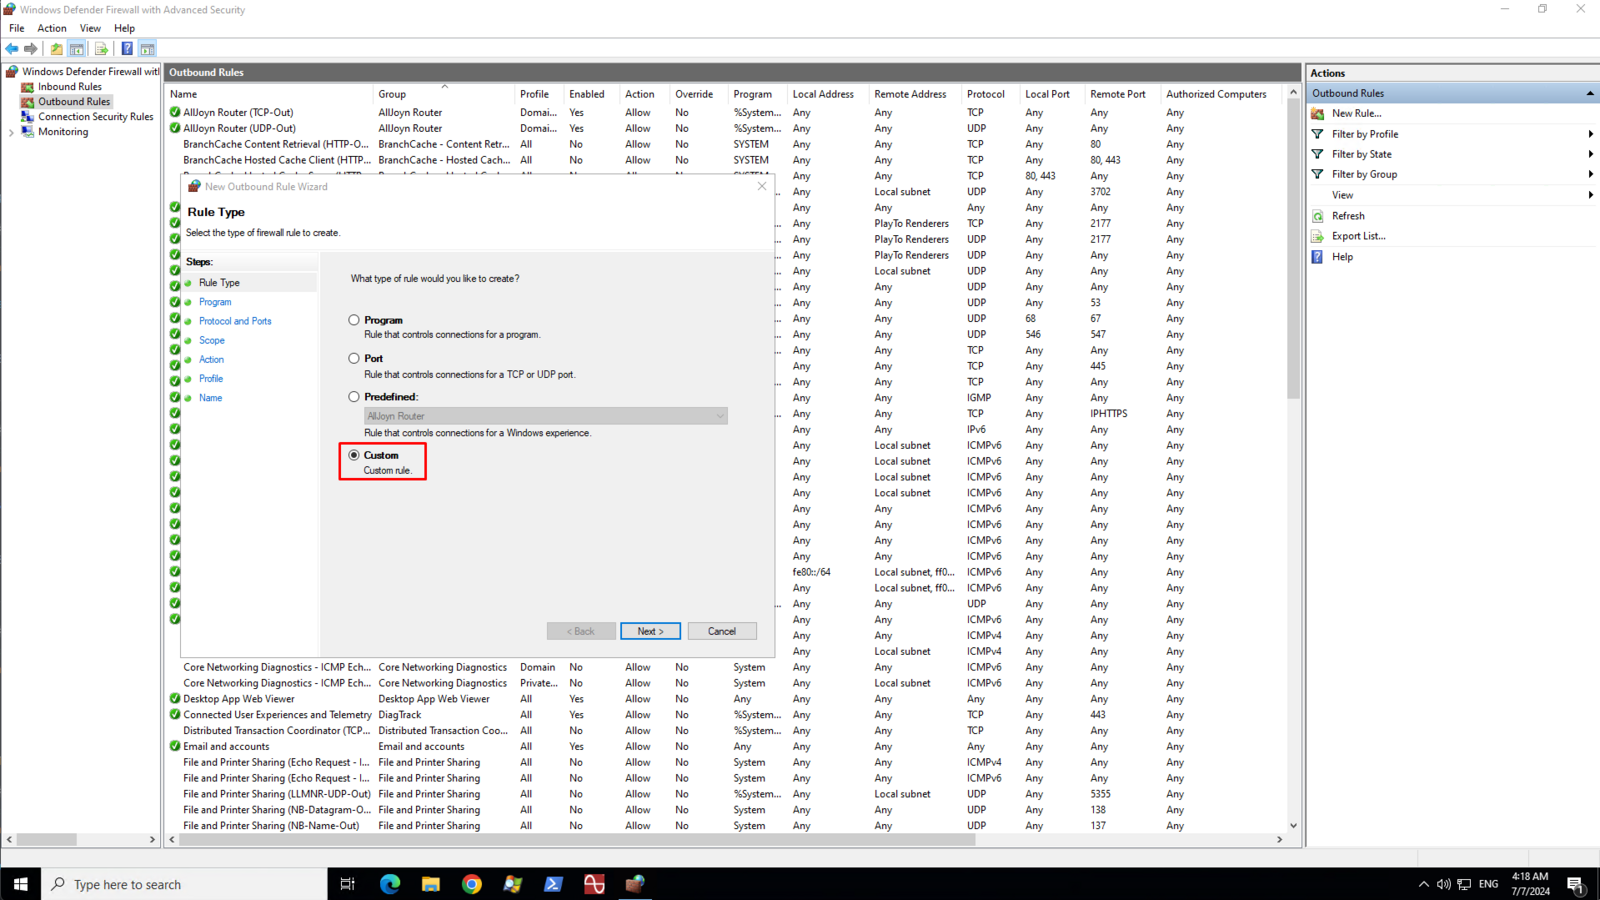
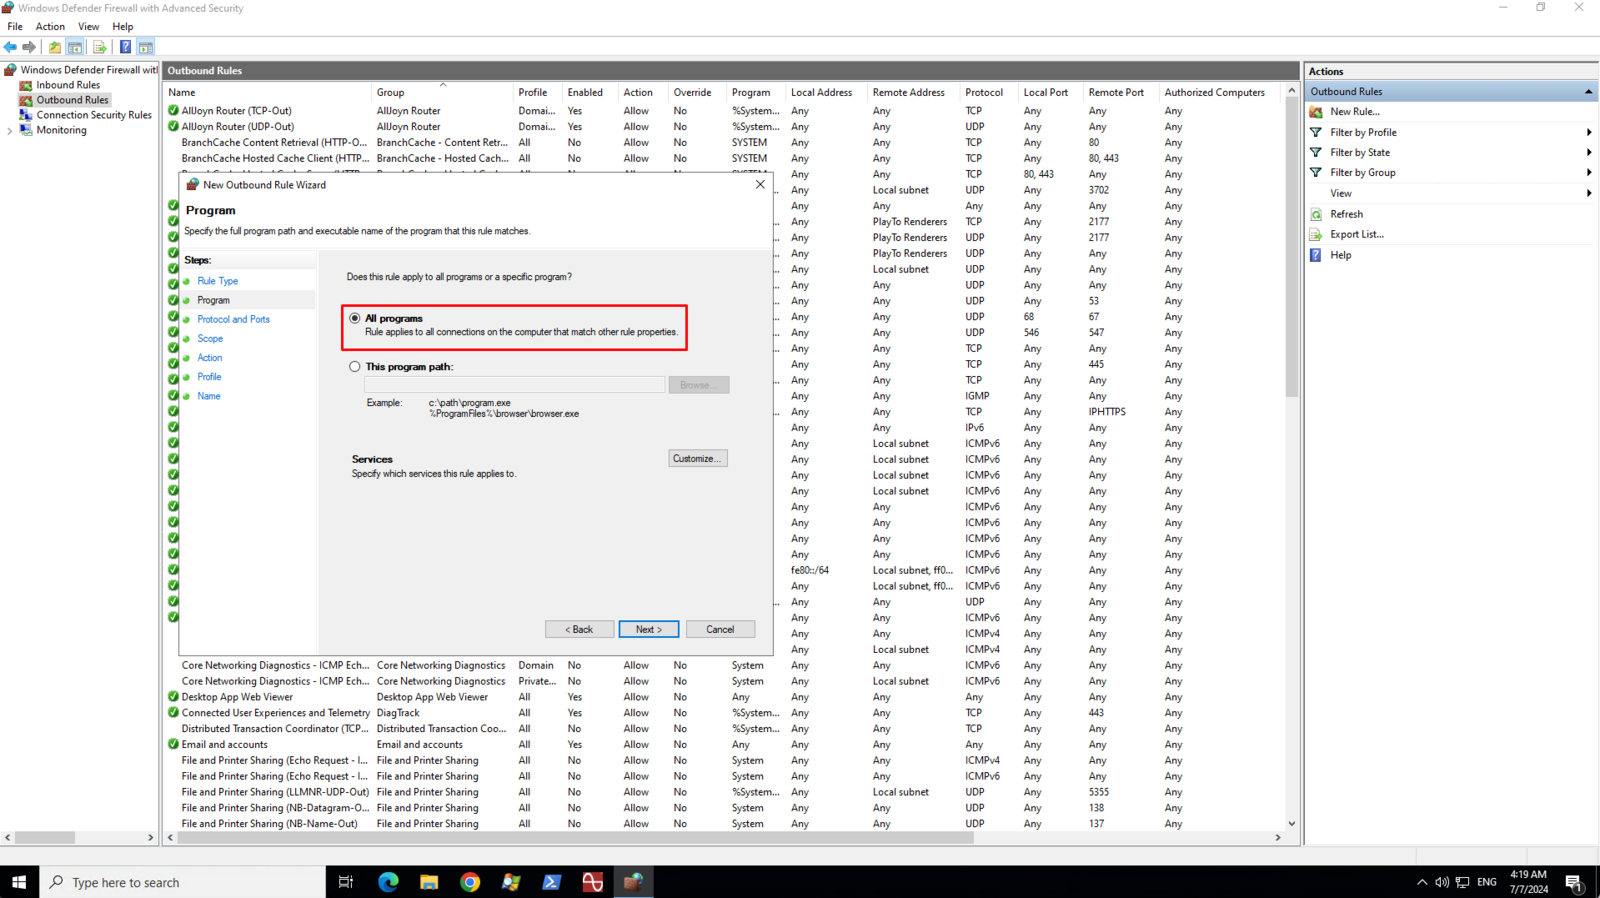
3On the Program page, select All Program then click Next
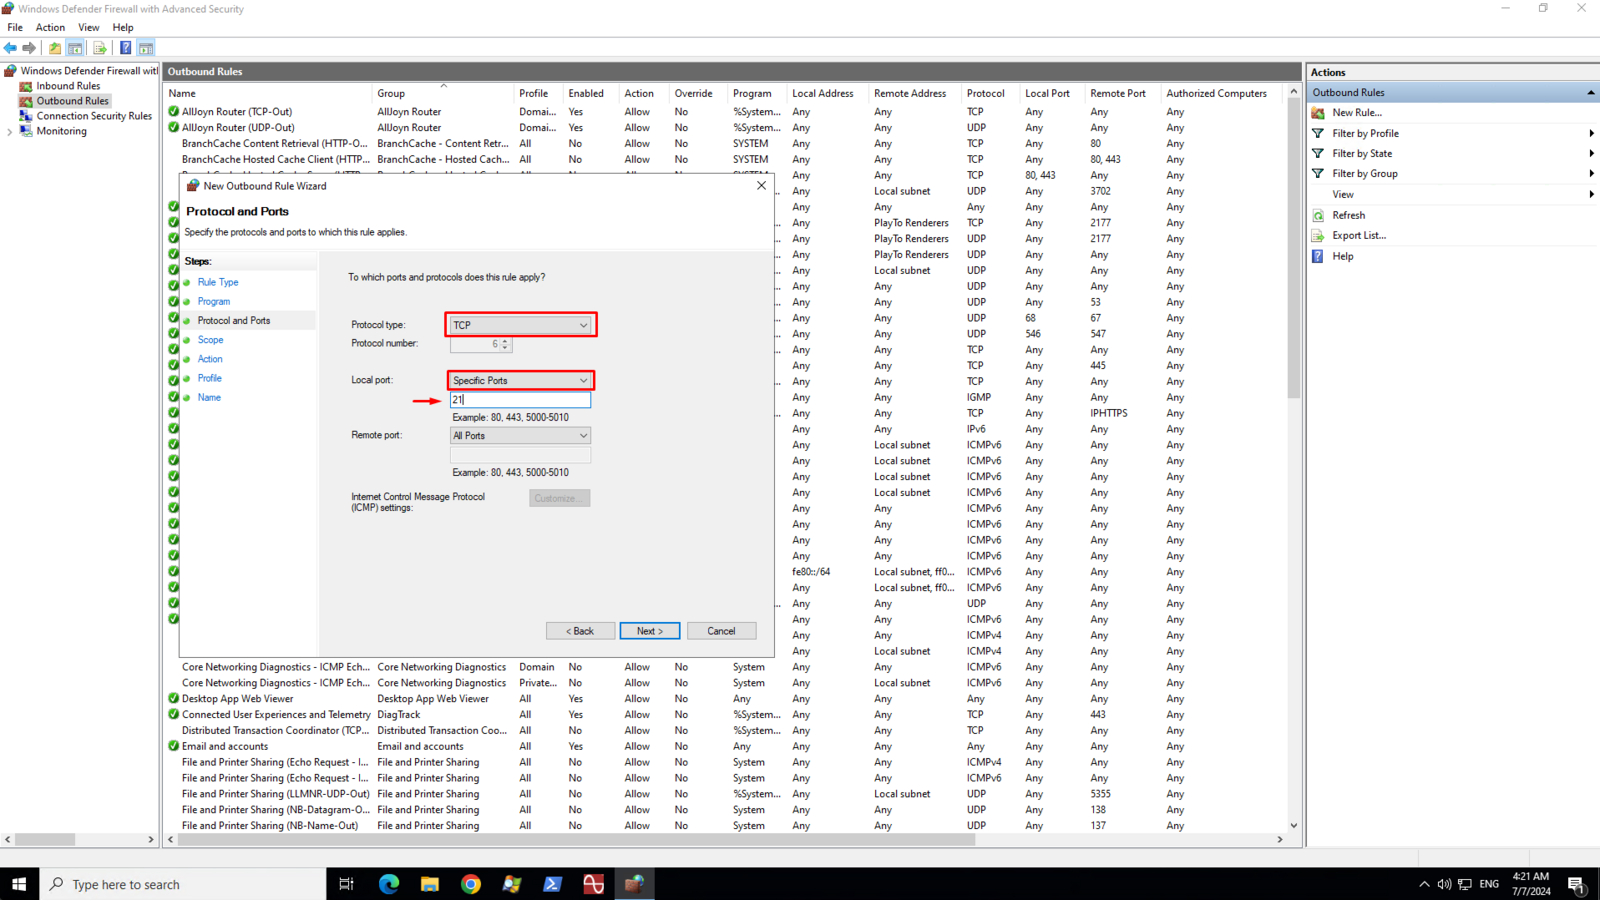
4On the Protocol and Ports page, select TCP from the list of Protocol Type. Select Specific Port from the list of aaLocal port and then enter the port number in the text field below the Local port drop down box. The port must match with the port number you assigned to your FTP bindings.
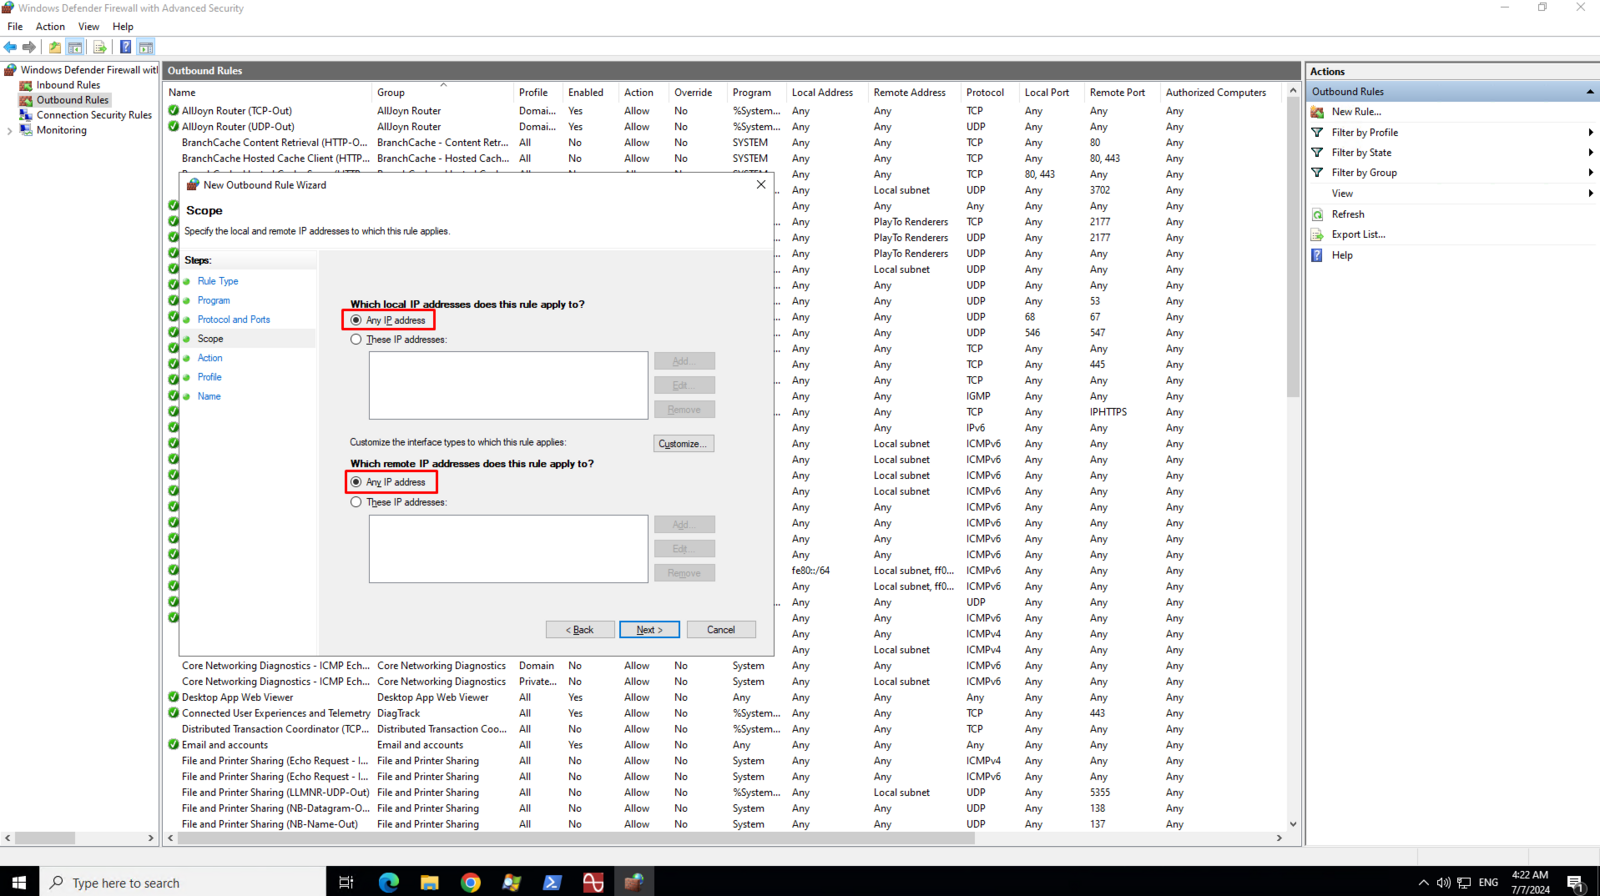
5On the Scope page, select Any IP address for both local and remote ip addresses then click Next
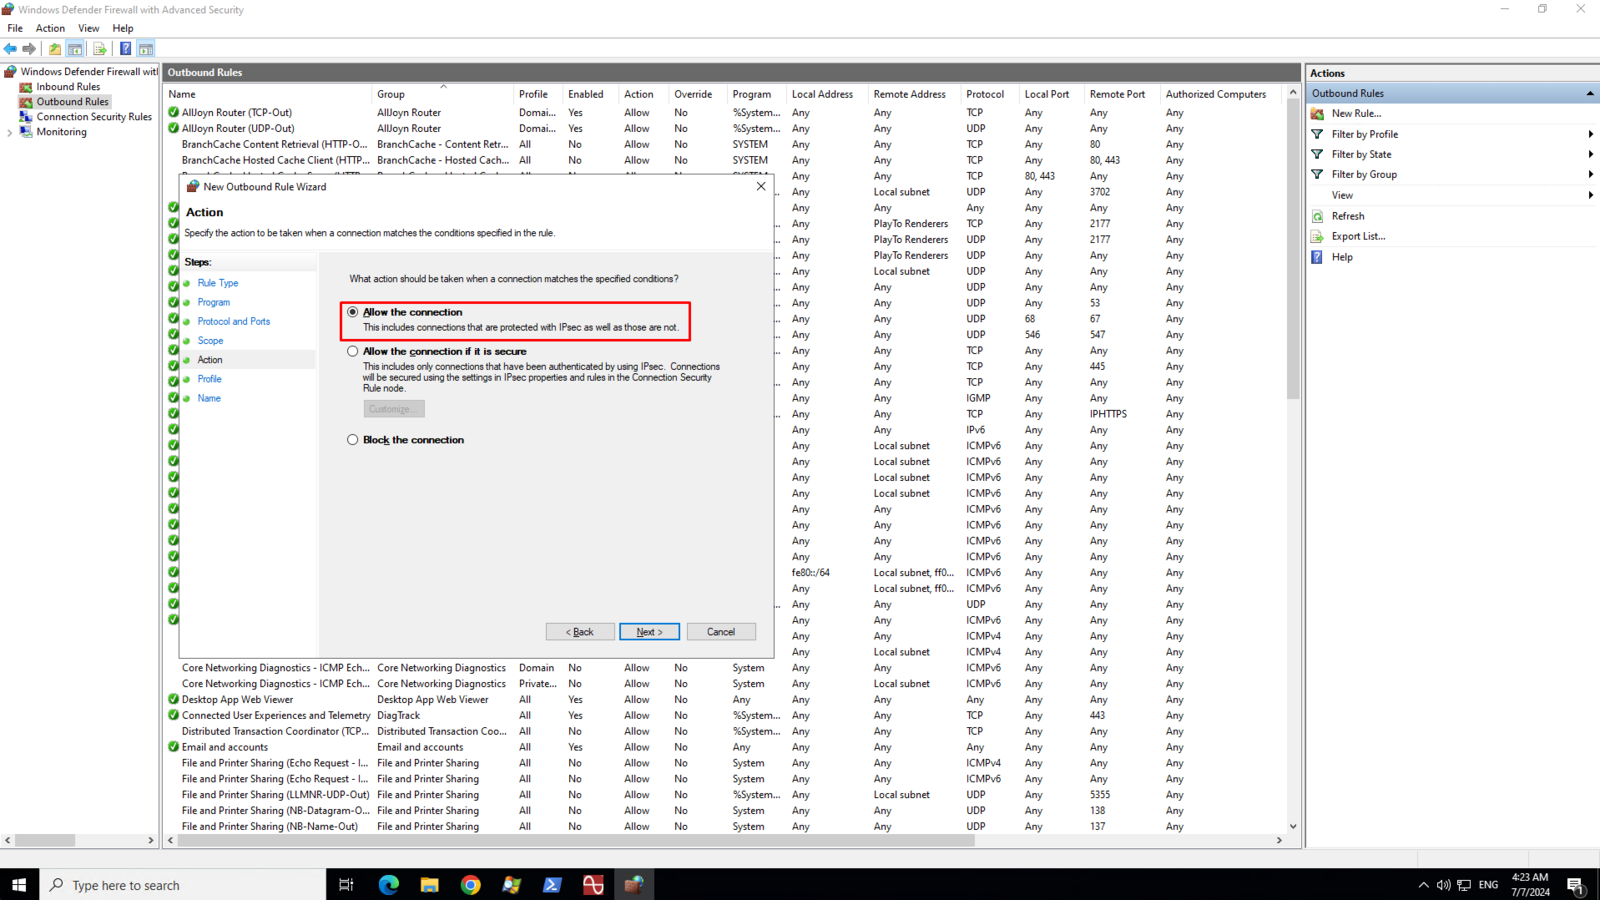
6On the Action page, select Allow the connection then click Next
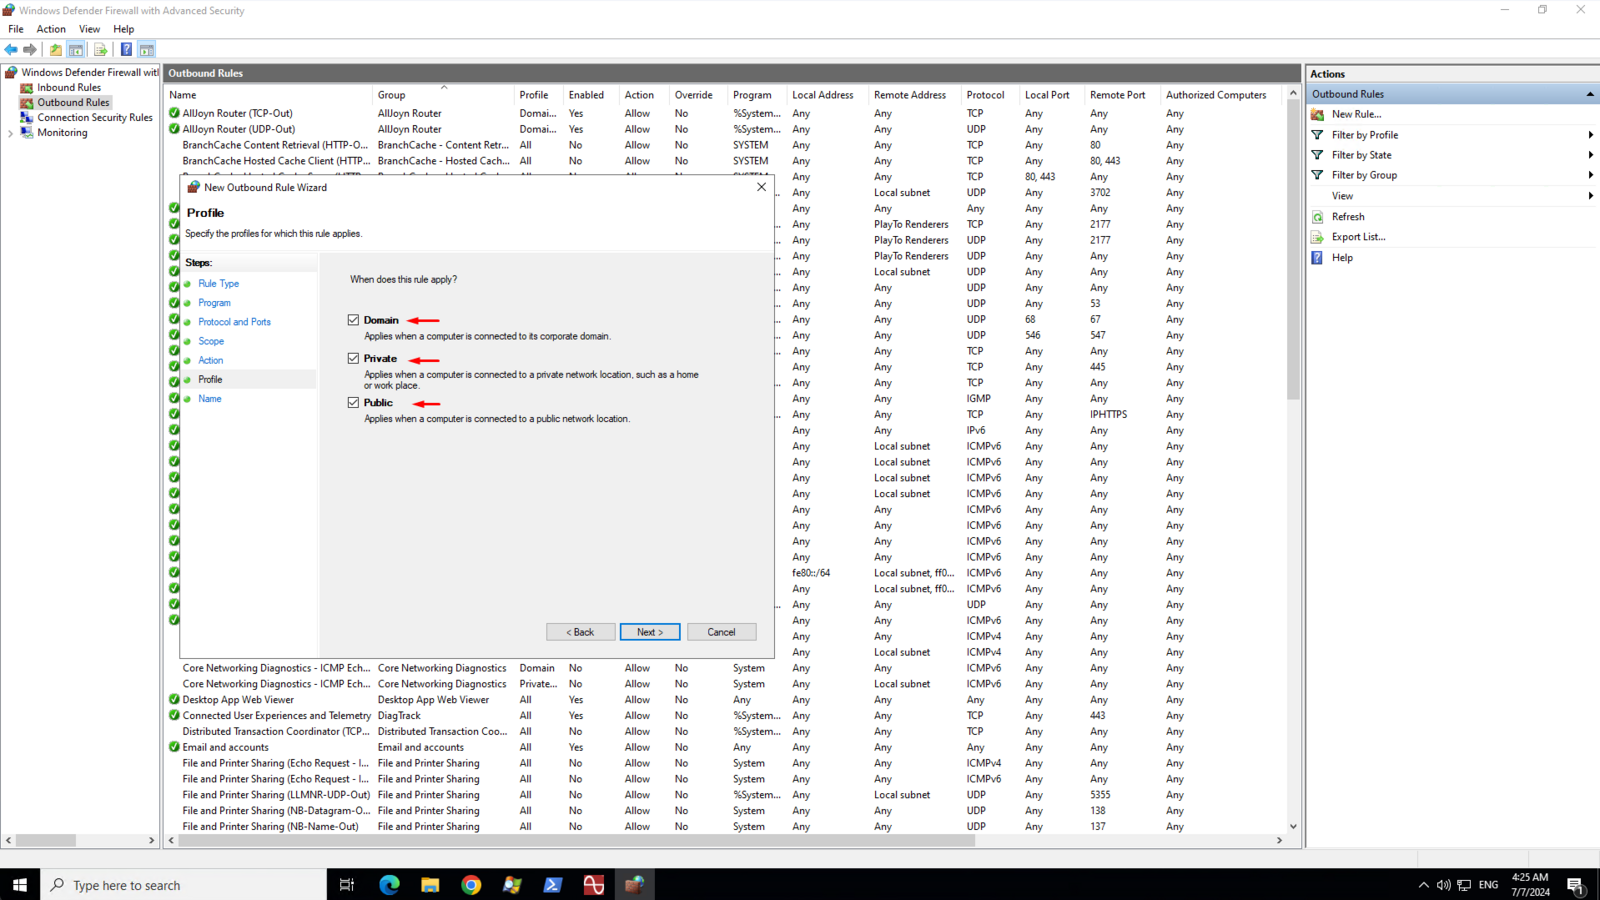
7On the Profile page, make sure that Doman, Private, and Public are checked then click Next
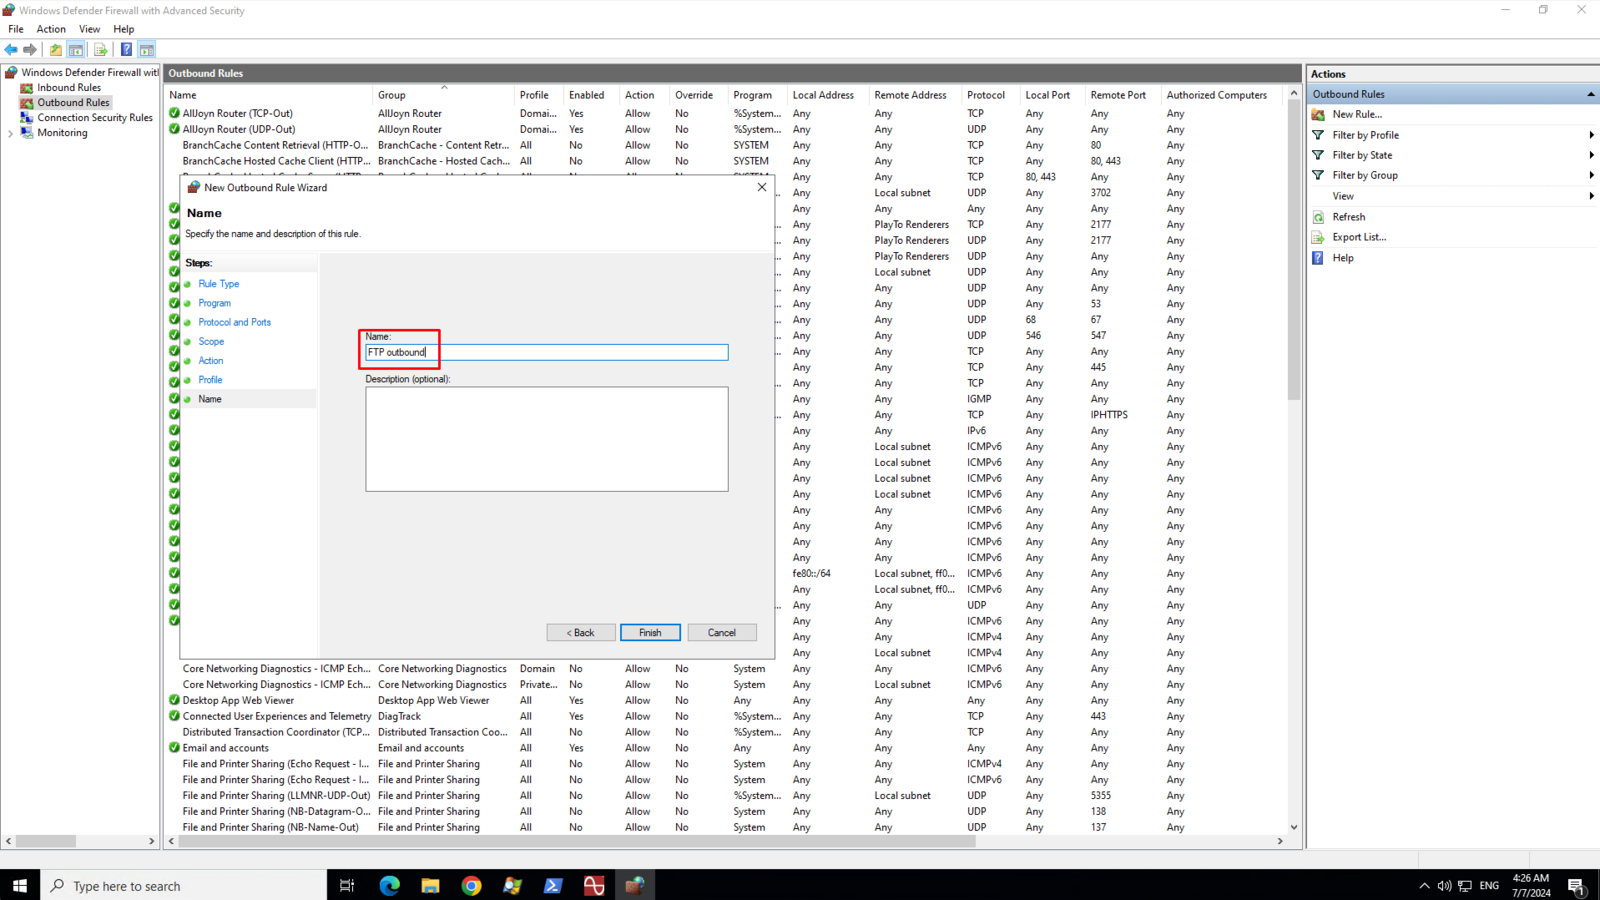
8Enter a name or description for your FTP outbound rule
9Restart your server for changes to take effect