To strengthen your server’s security, we recommend you change your default username (Administrator) on your VPS or dedicated server. This guide is here to walk you through the process of changing your username on your server!
Note
Important: It’s absolutely critical to remember your new administrator username. We can reset the password for your Windows VPS/dedicated server, but recovering a forgotten username requires either a complete and total operating system reinstallation or a restoration from an earlier backup.
Warning
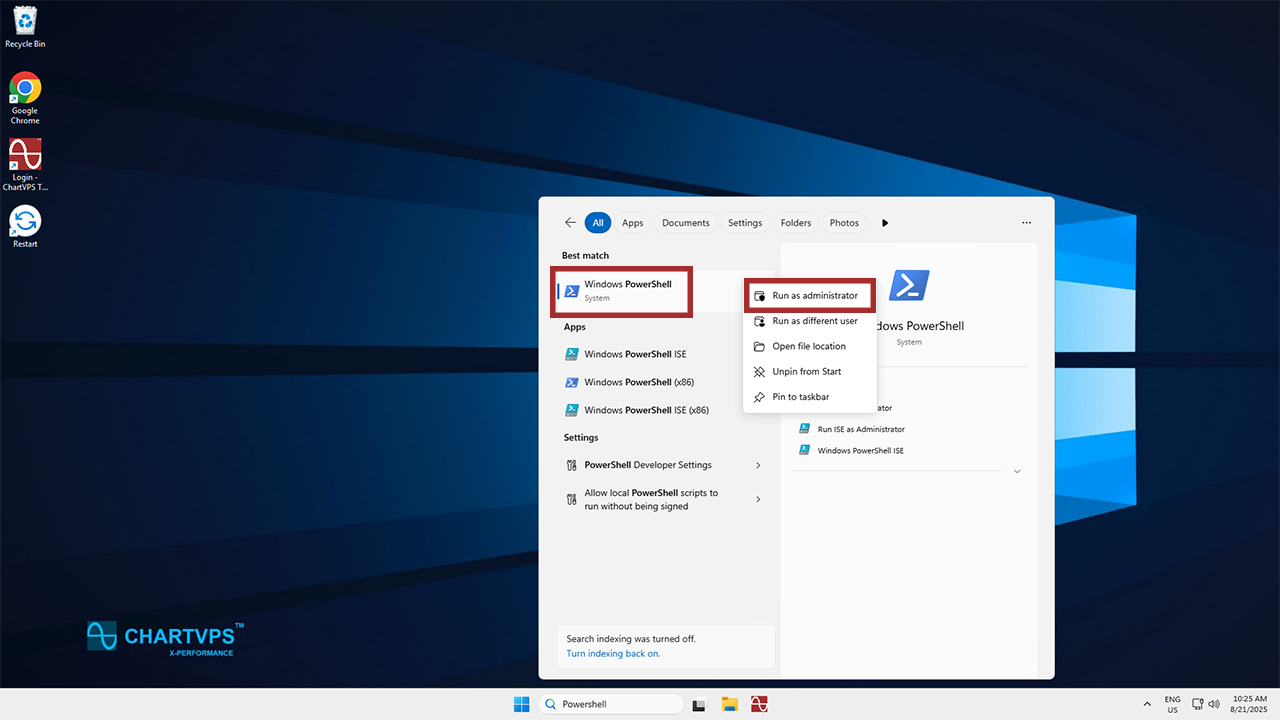
1From the get-go, you’ll be launching PowerShell with administrative privileges. In the Windows Search bar, go ahead and type “PowerShell.” Then, right-click the application and click Run as administrator. This gives you additional privileges in the program!
2Now that you’ve got PowerShell open, copy and paste this command into the program while swapping out CurrentUsername for your current username (likely Administrator) and NewUsername for the name you want to change it to:
Rename-LocalUser -Name "CurrentUsername" -NewName "NewUsername"- Here’s an example: let’s say your current username is Administrator and you want it to be HelpdeskChartVPS, then you’d want to run this command:
Rename-LocalUser -Name "Administrator" -NewName "HelpdeskChartVPS"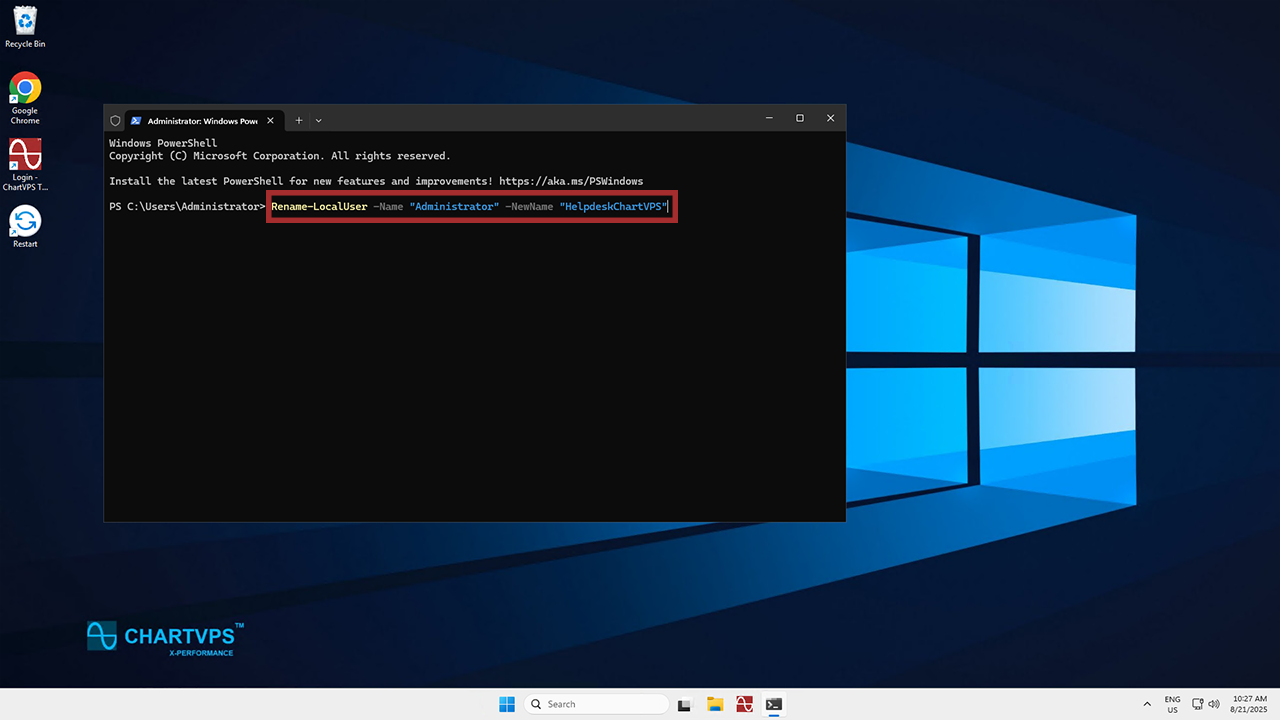
3Once that executes successfully, PowerShell will return to the command prompt without displaying an error message. At this time, restart your VPS or dedicated server so the changes take effect. Then, use your shiny new username to reconnect!
Confused by any of these steps or just need help with your server in general? Our friendly support team is available 24/7!
Note